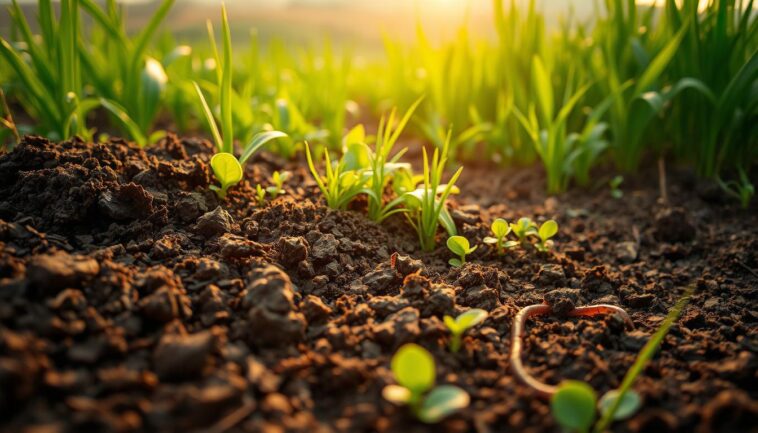
I’m excited to share my knowledge on soil preparation for spring planting. This topic has really caught the attention of gardeners, with 7541 views of the guide. As a gardener, I know how key soil preparation is for a great spring planting season.
Getting your soil right is vital for your plants to grow well. It’s important to avoid common mistakes that can harm your garden. In this guide, I’ll give you important tips and insights on soil preparation. This includes the right tilling depth and why removing weeds is so important.
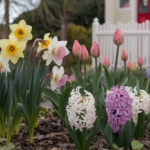
Soil preparation is a key step in spring planting, and starting early is essential. By using the right gardening tips and techniques, you can make your soil fertile. This will help your plants grow better, reduce soil erosion, and create a healthy environment for them.
As we explore soil preparation, I’ll share my expertise on the best practices. We’ll talk about testing soil pH and adding organic matter. With my help, you’ll be on your way to a thriving garden that will impress everyone. Whether you’re new to gardening or have experience, my guide will give you the tools and knowledge you need. I’ll show you how to make the most of your soil preparation for a successful spring planting season.
Why Soil Preparation Makes or Breaks Your Garden
As a gardener, I’ve learned that healthy soil is key to a thriving garden. Well-prepared soil gives plants the nutrients they need and supports their growth. It also makes plants less likely to get sick or attacked by pests.
Poor soil preparation, on the other hand, can cause problems. It can lead to a lack of nutrients and compacted soil. These issues can slow down plant growth.
Understanding the role of healthy soil is important. Healthy soil is full of microorganisms, fungi, and bacteria. These tiny helpers nourish plants. Adding compost or manure to the soil helps create a healthy environment for plants.
To get the best out of your plants, it’s important to tackle common soil problems. Issues like soil compaction, nutrient deficiencies, and poor drainage can harm plants. By loosening the soil and adding organic matter, we can improve its structure and health.
Regular soil tests are also key. They help us know the soil’s pH and nutrient levels. This information guides us in making the right soil amendments.
Here are some tips for keeping your soil healthy:
* Add organic matter at least once a year.
* Use natural mulch to keep the soil moist.
* Avoid working the soil when it’s wet to prevent compaction.
* Plant cover crops to improve soil structure and add organic matter.
By following these tips and focusing on soil preparation, we can create a garden that supports healthy plant growth and avoids common soil problems.
When to Start Preparing Your Soil for Spring Planting
To figure out when to start getting your soil ready for spring, look at your area’s last frost date. Usually, you should start getting your soil ready a few weeks before this date. For example, in Northeast Ohio, the last frost date is around May 15. So, you can start getting your soil ready in late March to late April.
Having a good plan for soil preparation is key. It helps make sure your soil is ready for spring. This includes making a plan that considers the weather, soil type, and the last frost date. With a good plan, you can make a soil that helps plants grow well.
Here are some important things to think about for your soil preparation plan:
- Start preparing your soil 2-3 weeks before the last frost date
- Apply a 2-3 inch layer of organic matter, such as compost or leaf mold, to the soil surface
- Allow the soil to settle for approximately 2 weeks before planting
By following these steps and making a detailed plan, you can make sure your soil is ready for a great spring planting season. Don’t forget to think about your specific planting schedule and climate when deciding when to start.
Essential Tools for Soil Preparation
As a gardener, having the right tools is key for success. The right tools help you prepare your soil for planting. You can choose from hand tools to power tools, depending on your needs.
Hand tools like a D-handle garden spade, a garden fork, and a cultivator are essential. They help loosen, cultivate, and aerate the soil. For instance, the D-handle garden spade has an 11-inch hardened steel blade for uniform digging.
Power tools can also make the job easier. Tools like tillers and cultivators help break up compacted soil. When picking power tools, think about your garden’s size and soil type.
Don’t forget safety equipment and protective gear. This includes gloves, safety glasses, and a mask to protect against debris and dust.
Some popular gardening tools and soil preparation equipment include:
- D-handle garden spade
- Garden fork
- Cultivator
- Tiller
- Cultivating fork
Understanding Your Soil Type
As a gardener, knowing your soil type is key to a healthy garden. There are six main soil types: clay, sandy, silty, peaty, chalky, and loamy. Each has its own pH, texture, and nutrient levels. For example, clay soil is hard to work with and takes time to warm up in spring. Sandy soil, on the other hand, drains fast and dries out quickly.
To find out your soil type, try this simple test: squeeze a handful of soil. If it falls apart easily, it’s sandy. If it holds its shape, it’s clay. Silty soil feels smooth and slippery. Knowing your soil type helps you improve its structure and fertility.
After figuring out your soil type, you can start making it better. For sandy soils, adding compost can help with water retention. Cover crops also add nutrients when tilled under. By improving your soil, you can grow a garden full of healthy plants.
Some plants do better in certain soils. Loamy soil is great for most vegetables and berries. Sandy soil is best for plants that don’t need much water. Clay soil works well for broccoli and beans after it’s been amended. Knowing your soil type helps you choose the right plants and care for them properly.
How to Test Your Soil pH and Nutrients
As a gardener, knowing about soil testing is key. It helps you understand your soil’s health and fertility. By testing pH levels and nutrients, you can spot any issues and fix them.
Soil pH ranges from 3.5 (very acidic) to 10 (highly alkaline). Most plants do best in a pH of 6.5 to 7, which is neutral to slightly acidic. Below 5.5 or above 8, nitrogen levels drop, so it’s important to check pH often.
Methods of Soil Testing
There are many ways to test your soil, from DIY kits to professional services. DIY kits are cheap and simple, with options like pH probes and meters. Professional services give detailed results, including nutrient levels and what you might need to add.
- Home pantry method: This uses vinegar and baking soda to test pH.
- Mail-in soil test kits: These kits are sold online and check pH and nutrients.
- Laboratory testing: This gives the most accurate results and is best for big gardens or farms.
Testing your soil regularly is vital for its health and fertility. It’s best to test every 2 to 5 years, or more often if you need to make changes. By keeping an eye on pH and nutrients, you can make your plants thrive.
Clearing and Cleaning Your Garden Bed
Spring is here, and it’s time to get our gardens ready. We need to clear out debris, weeds, and other obstacles. This makes room for new growth and keeps our plants healthy.
Experts at Savvy Gardening say it’s key to remove weeds before they seed. This stops weeds from taking over. Cleaning our garden beds also means less use of harmful chemicals, making our gardening greener.
Here are some tips for getting your garden bed ready:
- Use your hands or tools like a garden fork to remove weeds and debris.
- Apply mulch to stop weeds and keep the soil moist.
- Check the soil’s pH and nutrient levels to see if it needs any help.
By following these steps, we can have a great gardening season. Don’t forget to keep up with watering and pruning to keep your garden looking its best all year.
Breaking Up and Loosening Compacted Soil
Soil compaction is a big problem that can stop plants from growing well and lower crop yields. It happens when the soil gets squished, making it hard for roots to spread out. This can be caused by heavy machines, lots of foot traffic, or even nature itself.
To fix this, we need to break up and loosen the soil. This lets water drain better, air get in, and roots grow strong.
Methods like double digging and tilling can help loosen the soil. Double digging means digging a trench and then working on the soil at the bottom. Tilling uses a machine to break up the soil. But, too much tilling can hurt by making it hard for water to move through.

When picking a method, think about the soil type and how compacted it is. For example, clay and loam soils might need double digging, while sandy soils might just need tilling. Also, areas with lots of heavy equipment or foot traffic often have more soil compaction.
To find the best way, look at these factors:
- Soil type: Heavier soils like clay and loam may need double digging, while sandy soils might just need tilling.
- Level of compaction: Very compacted soils might need more intense methods, like double digging.
- Equipment availability: If you have heavy equipment, tilling might be faster.
Adding Organic Matter to Your Soil
As I get ready for spring planting, I’ve learned how key organic matter is. It makes the soil better for plants. This is done by composting, which turns organic stuff into a rich soil mix.
Composting can use different materials, each with its own perks. For instance, manure compost gives plants the nutrients they need. Leaf compost helps with drainage and air in the soil. I mix lawn clippings, veggie scraps, and leaves to make my compost. Then, I turn it often to help it break down right.
Adding organic matter to my soil helps a lot. It makes the soil better at holding water and air. This is great for sandy soils that often lose water and nutrients. It also helps my plants grow strong and healthy.
Using compost can also save water in new gardens. This makes gardening more eco-friendly. It’s a win-win for both my garden and the planet.
To make compost, I mix materials with a lot of carbon, like leaves, with those high in nitrogen, like manure. Keeping the pile moist and turning it often helps it break down well. By doing this, I make my garden a better place for plants to grow, without needing harmful chemicals.
Balancing Soil Nutrients for Optimal Growth
To get plants to grow well, you need to balance soil nutrients. It’s important to know about different fertilizers, like organic and synthetic ones. Choosing the right fertilizer is key for your garden’s health. Soil tests help you understand nutrient levels and pH.
Experts say soil preparation is vital for healthy soil. Adding organic matter like compost improves soil nutrients and water retention. Plants like corn and tomatoes do well with fertilizers like blood meal, which is rich in nitrogen.
There are many fertilizers to choose from. Organic fertilizers, like compost and kelp meal, offer long-term nutrition. Synthetic fertilizers are quick but concentrated. It’s important to pick the right fertilizer for your plants and soil.

Understanding soil nutrients and fertilizers helps you grow a healthy garden. Always test your soil and adjust your fertilizer use to keep nutrients balanced.
How to Prepare Your Soil for Spring Planting
When I start getting my soil ready for spring, I know it’s all about the right mix. First, I test my soil to see what nutrients it has and its pH level. This tells me what I need to do to get it ready. The guide on steps for a productive spring garden says adding compost is key to better soil health.
Adding compost and organic fertilizer to the top 8-12 inches of soil is vital. It makes the soil better at holding water and nutrients. It also helps with drainage and brings life to the soil. To get rid of weeds and keep the soil moist, I rake the top layer and use mulch.
Here are some important things to think about when preparing your soil:
- Soil tests are a must for gardens that haven’t been checked in over five years.
- A good mix for new gardens is 30% topsoil and 70% compost.
- Working on wet soil can make it clumpy, which is bad for plants.
By following these tips and knowing what my soil needs, I can make a garden that will grow well. Starting a garden is tough, but with the right soil care, you can do great. Remember, the first year is the hardest, but with the right steps, you’ll see success soon.
Managing Soil Moisture Levels
As a gardener, I know how key it is to manage soil moisture. Soil moisture can change fast in spring. This is due to more evaporation, changing rain, and thawing ground. To keep soil moisture right, we need good drainage and a plan for watering.
Using deep and less frequent watering helps save water and keeps moisture even. Mulching can cut down moisture loss by up to 50%, depending on the mulch. Also, collecting rainwater can lessen the need for watering.
Here are some tips for managing soil moisture levels:
- Use moisture sensors or timers to cut water use by 30-50% compared to old ways of watering.
- Change crops to improve soil and keep moisture better, which might cut down irrigation needs by up to 25%.
- Water in the early morning or late evening to lose less water to evaporation.
It’s important to check soil moisture often. Sadly, 70% of gardeners don’t do this, leading to too much or too little water. By using these tips, gardeners can manage soil moisture well, save water, and help plants grow strong.

| Soil Moisture Level | Description |
|---|---|
| 100% | No free water appears; outline of ball left on hand. |
| 100-75% | Forms a weak ball; breaks easily when bounced on hand. |
| 75-50% | Will form a ball but falls apart when bounced; slicks under pressure. |
| 50-25% | Appears dry; crumbles but holds together with pressure. |
| 25-0% | Dry, loose, flows through fingers; hard and difficult to break into powder. |
Natural Soil Amendments and Their Uses
As a gardener, I’ve found that natural amendments are key for soil health. They boost nutrient availability by improving how the soil holds onto nutrients. This is vital for growing strong crops. Examples include compost, manure, and peat moss.
These additions do more than just add nutrients. They also make the soil better for plants by reducing compaction and improving air flow. This helps water and nutrients move around, leading to healthier plants. Here are some benefits of using natural amendments:
- Improve soil structure and nutrient availability
- Reduce compaction and enhance aeration
- Provide a long-term investment in soil health
- Support the growth of beneficial microorganisms
When picking a natural amendment, think about what your soil needs. For example, if your soil is too acidic, adding lime can help. If it’s too alkaline, sulfur might be needed.
Adding natural amendments to your soil care routine helps create a balanced ecosystem. This supports your plants’ growth. Always test your soil to find the right natural amendment for your soil type and needs.
Dealing with Problem Soils
As a gardener, I’ve faced many problem soils. From clay that holds too much water to sandy soils that can’t hold water or nutrients, each issue needs a special fix. We’ll look at common soil problems and how to solve them, helping your garden thrive.
Soil problems can be tough, but the right steps can solve them. For clay soils, adding organic matter helps break up the clay and improves drainage. Sandy soils benefit from compost or manure, which helps them hold water and nutrients better.
Common Soil Problems and Solutions
- Clay soils: Add organic matter like compost or well-rotted manure to improve drainage and aeration.
- Sandy soils: Incorporate compost or manure to increase water-holding capacity and nutrient retention.
- Acidic or alkaline soils: Use lime or sulfur to adjust the pH level, depending on the specific needs of your plants.
It’s key to know the exact soil problem and pick the right fix. This way, you can make a healthy soil environment that supports plant growth. Remember, each soil type needs a different approach, so what works for one might not work for another.
Understanding your soil’s unique traits and using the right solutions can help you overcome common issues. Whether you’re dealing with clay, sandy, or acidic soils, there are ways to make your garden flourish.
| Soil Type | Common Problems | Solutions |
|---|---|---|
| Clay | Waterlogging, poor drainage | Add organic matter, improve drainage |
| Sandy | Poor water-holding capacity, nutrient deficiency | Incorporate compost or manure, use mulch |
| Acidic or Alkaline | Imbalanced pH, nutrient deficiencies | Use lime or sulfur to adjust pH, add organic matter |
Maintaining Soil Health Throughout the Season
As the growing season goes on, keeping your soil healthy is key. Regular soil tests and tweaks are vital for your plants to do well. Adding compost or organic matter every few months brings back nutrients and improves soil texture.
Techniques like mulching and cover cropping help too. They stop soil from getting compacted and losing moisture. This keeps the soil in the perfect state you’ve worked so hard to achieve.
Healthy soil is the base of a great garden. By focusing on long-term care, your plants will get the nutrients and structure they need. This will help them grow to their best. So, keep up the good work in maintaining your soil’s health, and enjoy a lush, vibrant garden all season.