There’s something incredibly satisfying about growing your own herbs at home, and thyme is one of the easiest and most rewarding to propagate. I remember the first time I clipped a sprig from a thriving plant and coaxed it into rooting—it felt like a small miracle. Growing thyme from cuttings doesn’t just save you money; it also gives you a head start on a healthy, established herb that you can use in the kitchen all year round.
In this post, we’ll walk through everything you need to know to grow thyme from cuttings, from selecting the right stems to rooting, transplanting, and caring for your new plants. Whether you’re gardening on a sunny balcony or maintaining a small indoor herb garden, thyme is an excellent addition to your green space.
Why Grow Thyme from Cuttings?
Thyme is a hardy perennial herb known for its small, fragrant leaves and earthy, slightly minty flavor. It’s commonly used in cooking, especially Mediterranean dishes, and thrives in a variety of growing conditions. Starting thyme from cuttings allows you to:
- Clone an existing healthy plant with known taste and growth characteristics.
- Grow thyme more quickly than starting from seed.
- Produce multiple plants from a single mother plant.
- Extend your herb garden without spending extra at the nursery.
Plus, once you’ve mastered this method, you’ll be able to propagate other woody herbs like rosemary, sage, and oregano just as easily.
Step 1: Choose and Prepare Your Cuttings
The first step to successful propagation is selecting the right cuttings. Choose a healthy, non-flowering thyme plant with sturdy, green stems.
Best Time to Take Cuttings
Spring through early summer is the ideal time for taking cuttings. During this period, thyme is in its active growth phase, and the stems are pliable but mature enough to root successfully.
How to Take Cuttings
- Use sterilized scissors or pruners to snip 4 to 6-inch cuttings from the tips of the plant. Avoid flowering stems, as they focus energy on blooming rather than rooting.
- Strip the bottom 2 inches of leaves from each cutting. These stripped portions will go into the soil or water, and bare nodes are essential for root development.
- If the tips are very soft or overly woody, trim them to a medium texture—slightly flexible, but not too green or brittle.
Step 2: Rooting Your Thyme Cuttings
You have two main options for rooting thyme: water propagation or soil propagation. Each method has its pros and cons, but both are effective.
Option 1: Rooting in Water
This is a great method for beginners, as you can watch the roots form.
- Place your cuttings in a small glass or jar of water.
- Make sure only the leaf-stripped portion is submerged; leaves in water can rot and spoil the rooting process.
- Keep the jar in a bright, warm location, but out of direct sunlight.
- Change the water every 2 to 3 days to prevent bacterial buildup.
In about 2 to 3 weeks, you should see small roots developing. Once the roots are at least 1 inch long, you can transplant them into soil.
Option 2: Rooting in Soil
Soil propagation takes a bit more patience, but results in a stronger transplant with less risk of transplant shock.
- Dip the cut ends in rooting hormone powder (optional but helpful).
- Insert each cutting into a pot filled with moist, well-draining potting mix. A blend of peat, perlite, and a little sand works well.
- Press the soil gently around each cutting to secure it.
- Cover the pot with a clear plastic bag or dome to maintain humidity, but leave some ventilation.
- Place in a warm, bright spot out of direct sun.
After 3 to 4 weeks, give the cuttings a gentle tug—if there’s resistance, roots have formed and the cuttings are ready for transplanting.
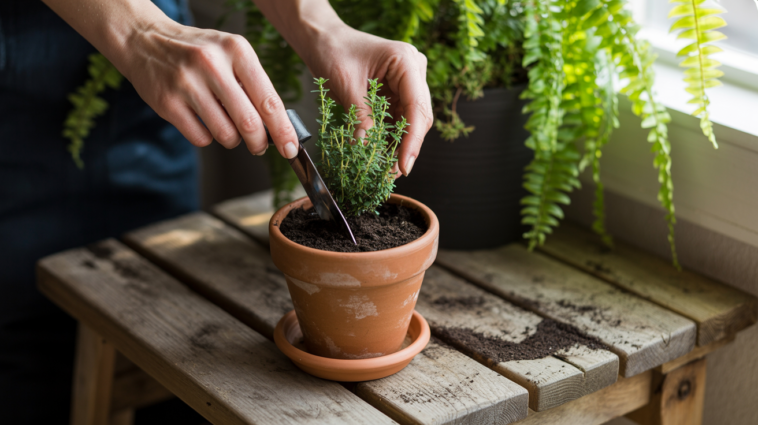
Step 3: Transplanting Your Rooted Cuttings
Once your thyme cuttings have rooted, it’s time to move them into their permanent containers or garden beds.
Choosing the Right Pot or Spot
- Containers: Use pots that are at least 6 inches wide and have excellent drainage.
- Soil: Thyme prefers dry, sandy or loamy soil with a neutral to slightly alkaline pH.
- Light: Place in a spot that receives at least 6 hours of sunlight daily. Full sun encourages strong growth and better flavor.
How to Transplant
- Gently remove your cuttings from the water or starter soil.
- Fill your pot or garden space with well-draining soil.
- Create a small hole and insert the cutting, covering the roots completely.
- Press the soil gently around the base.
- Water thoroughly after transplanting, then allow the soil to dry between waterings.
Step 4: Caring for Your New Thyme Plants
Thyme is wonderfully low-maintenance, but a little care goes a long way in keeping it lush and productive.
Watering
Thyme is drought-tolerant and doesn’t like soggy soil. Water only when the top inch of soil feels dry. Overwatering is the most common issue for thyme—ensure your containers have proper drainage.
Pruning
Regular pruning helps your thyme stay bushy and prevents it from getting woody or leggy. Snip back stems regularly, especially during the growing season. Don’t be afraid to harvest frequently—thyme actually benefits from trimming.
Fertilizing
Thyme doesn’t require heavy feeding. In fact, too much fertilizer can reduce its aromatic oils. Use a diluted organic fertilizer or compost tea once a month during the growing season, or simply amend your soil with compost at planting time.
Pests and Diseases
Thyme is naturally resistant to many pests, but occasionally aphids or spider mites may appear. A gentle spray of neem oil or insecticidal soap usually clears them up. To prevent fungal issues, avoid watering from above and ensure good air circulation around your plants.
Final Thoughts
Growing thyme from cuttings is a simple and fulfilling process that offers both culinary and ornamental rewards. Within a few short weeks, you can have a thriving new plant ready to join your herb garden, all from a single snip. Whether you’re cultivating a windowsill herb collection or enhancing a patio garden, thyme is a fragrant, flavorful, and easygoing addition.
Give it a try—clip a sprig, start a cutting, and watch your garden grow from one small stem into something delicious.