There’s something truly grounding about walking out to your patio or balcony and plucking a few fresh sage leaves right from the plant. Sage has long been one of my favorite herbs—not just for its earthy, comforting flavor, but also for how effortlessly it grows once you get it started. One of the most rewarding ways I’ve expanded my sage collection is by growing it from cuttings. No seeds, no waiting for germination—just a few snips from a healthy plant, and you’re well on your way.
Over the years, I’ve learned that propagating sage from cuttings is not only easy but incredibly satisfying. If you’ve never tried it, let me walk you through my exact method so you can enjoy this beautiful, resilient herb as much as I do.
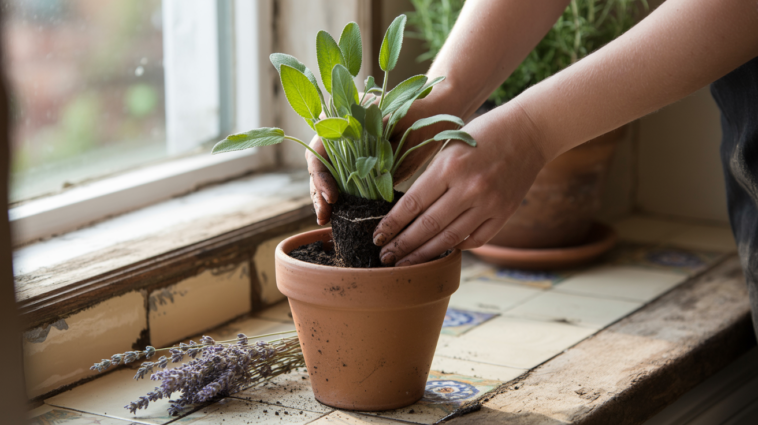
Choosing the Right Container for Rooting Sage

When I start with sage cuttings, I usually root them in water first, then transplant them into soil once the roots develop. For rooting, I use a clear glass or jar so I can keep an eye on the progress. After about 2–3 weeks, I transfer the rooted cuttings into containers.
Sage prefers a pot that provides plenty of drainage, so I use terracotta or unglazed ceramic pots around 8 to 12 inches wide. These materials allow the soil to breathe, which helps prevent soggy roots. It’s crucial that the pot has drainage holes at the bottom—sage absolutely hates wet feet.
If I’m planting multiple sage cuttings together, I give each one about 6 to 8 inches of space so their roots have room to spread without competing too much.
Picking the Best Sage Variety
There are several types of sage, but for growing from cuttings, I’ve had the most success with these:
- Common Sage (Salvia officinalis): This is the classic culinary sage with silvery-green leaves. It’s hardy, aromatic, and thrives in containers.
- Purple Sage: Beautifully tinted leaves that add visual interest to your herb garden, with the same flavor as common sage.
- Tricolor Sage: Green leaves with purple and white edges—very ornamental and great for patio pots.
- Pineapple Sage: More of a novelty, this variety has a fruity scent and bright red flowers. It’s a bit more tender, but it also roots well from cuttings.
Most of my sage propagation happens with common and purple sage, simply because they’re both flavorful and tough. But feel free to experiment if you already have other varieties on hand!
Taking and Rooting Sage Cuttings
I usually take my sage cuttings in spring or early summer when the plant is growing actively. Here’s the step-by-step process I follow:
1. Choose the Right Stem
I look for healthy, non-flowering stems that are 4 to 6 inches long. Ideally, I want softwood cuttings—stems that are green and slightly flexible. If the stem is too woody or too soft and new, it may not root well.
2. Make a Clean Cut
Using clean pruning shears or scissors, I snip just below a leaf node. Then I gently strip off the leaves from the bottom half of the stem. This is where the roots will form, and removing the leaves prevents rot.
3. Optional: Use Rooting Hormone
Sometimes I dip the cut end in rooting hormone to speed up the process, especially if I’m rooting in soil. But sage usually does fine without it, especially if rooted in water.
4. Place in Water or Soil
When I’m rooting sage in water, I place the cuttings in a small glass and make sure the bottom inch is submerged. I change the water every couple of days to keep it fresh. In 2–3 weeks, I usually start to see little white roots forming.
If you prefer soil, use a potting mix with good drainage (like a mix of peat moss, perlite, and sand). Insert the cutting about an inch deep, water it lightly, and cover it with a plastic dome or bag to retain humidity until roots form.
Once the roots are about 1–2 inches long, I pot them up in containers or directly into the garden bed if it’s warm enough outside.
Transplanting and Caring for Your Sage Plant
Once my sage cuttings are well-rooted, I transplant them into their final containers filled with a gritty, well-draining soil mix. Sage comes from Mediterranean climates, so it’s used to dry, rocky soil and lots of sunshine.
Sunlight
Sage loves the sun! I place my pots where they get at least 6 to 8 hours of direct sunlight per day. If you’re growing indoors, a sunny windowsill or a grow light setup works just fine.
Watering
This is where I used to trip up. Sage doesn’t like to be overwatered. I only water when the top inch of soil feels dry, and I make sure the pot drains well. A soggy pot is a recipe for root rot, especially for young plants.
Soil and Fertilizer
I use a light, well-draining potting mix—usually a blend of cactus soil and compost, or regular potting soil with added perlite. I fertilize lightly once a month with a balanced organic liquid fertilizer during the growing season. Too much nitrogen can make the plant leggy, so I keep it minimal.
Pruning and Harvesting
To keep the plant bushy and encourage new growth, I start pinching back the tips once it’s around 6 inches tall. When I harvest, I cut a few inches above the base, just above a set of leaves. I try not to remove more than one-third of the plant at a time to keep it strong and healthy.
Dealing with Pests and Problems
Sage is surprisingly pest-resistant, which is one of the reasons I love growing it. That said, I occasionally deal with:
- Aphids or spider mites: A quick spray with neem oil or insecticidal soap takes care of them.
- Powdery mildew: This can happen in humid conditions. I improve airflow around the plant and make sure not to water the leaves.
- Root rot: This is usually caused by overwatering or poor drainage. If the soil stays too wet, I repot into drier, sandier soil and cut back on watering.
Final Thoughts
Growing sage from cuttings has been one of the easiest and most satisfying ways to multiply my herb garden. It’s fast, economical, and doesn’t require much space. I love that with just a few snips, I can fill my garden with fragrant, flavorful sage that I use almost daily in my cooking.
Whether you have a sunlit balcony, a patio, or even just a bright kitchen window, sage can thrive with just a little care. Once it’s rooted and established, it’s a tough, drought-tolerant herb that gives more than it asks for.
If you haven’t tried propagating sage yet, now’s the perfect time. Give it a try—you might just find yourself with more sage than you know what to do with (not that that’s ever a bad thing!).