There’s something incredibly satisfying about growing rosemary from cuttings. It feels like a small miracle—snipping off a stem from a mature plant and turning it into a new, thriving rosemary bush of your own. I remember the first time I tried it. I had a few sprigs leftover from a hearty roast chicken recipe, and instead of tossing them in the compost, I decided to root them. That decision blossomed into a long-standing love affair with propagating herbs from cuttings. If you’re thinking about doing the same, rosemary is one of the best herbs to start with.
Let me walk you through everything you need to know to successfully grow rosemary from cuttings—even if you’re working with limited space or starting indoors.
Choosing the Right Container for Rosemary Cuttings
Since I do a lot of container gardening, I’ve rooted and grown rosemary in all sorts of pots—from simple plastic nursery pots to repurposed mason jars. For rooting the cuttings, I typically start with a small container like a 4-inch pot or even a wide glass jar. What matters most is that the container allows for good airflow and drainage.
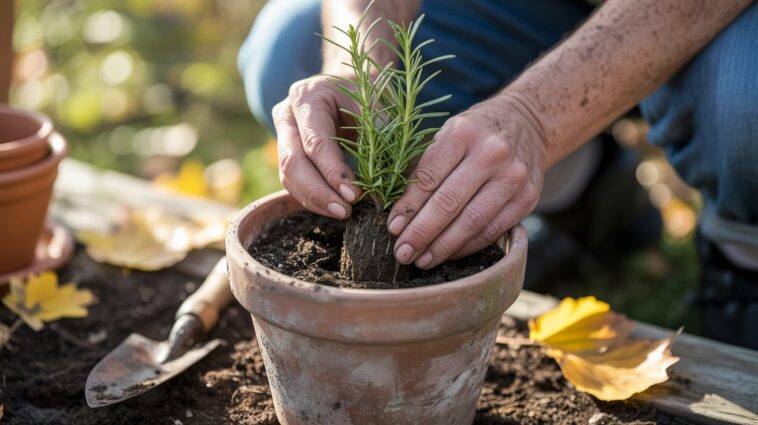
Once your cuttings have rooted and are ready for transplanting, you’ll want to move them into a larger pot—at least 12 inches in diameter and with a drainage hole. Rosemary doesn’t like soggy roots, so terra cotta pots work great because they allow moisture to evaporate naturally. You can also go with plastic or ceramic containers, just make sure they’re not water-retentive and that you add a layer of gravel at the bottom to help with drainage.
Selecting the Best Rosemary Variety
If you’re taking cuttings from an existing plant, you probably won’t have much say in the variety. But if you’re buying rosemary to start cuttings, look for cultivars that suit your growing conditions. Here are a few popular options I’ve had success with:
- ‘Arp’: Exceptionally cold-hardy and great for container growing.
- ‘Tuscan Blue’: Tall and upright, with vivid blue flowers and strong aroma—ideal for culinary use.
- ‘Prostratus’: A trailing variety that works beautifully in hanging baskets and over container edges.
- ‘Spice Islands’: My personal favorite for cooking—it has an intense fragrance and robust flavor.
Each of these varieties will root well from cuttings, so pick one that suits your needs—whether it’s for the kitchen, your garden aesthetic, or your climate.
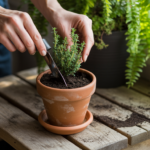
Taking and Planting the Cuttings
The best time to take rosemary cuttings is in late spring or early summer when the plant is actively growing. However, I’ve successfully rooted rosemary at other times of the year indoors, provided there’s enough light and warmth.
Here’s how I take and prepare my rosemary cuttings:
- Choose healthy stems – Look for green, flexible stems that aren’t too woody. I usually cut 4 to 6-inch sections from near the top of the plant.
- Strip the leaves – I gently remove the leaves from the bottom two inches of the cutting. This is the portion that will go into the soil or water.
- Optional: Dip in rooting hormone – Although rosemary can root without it, using a rooting hormone can speed up the process and improve success rates. I dip the stripped end into the powder before planting.
- Plant in soil or place in water – You can root rosemary cuttings in either water or soil. If I’m using water, I make sure the bottom 1–2 inches are submerged and change the water every few days. If I’m planting directly in soil, I use a mix of potting soil and perlite or sand for good drainage.
In about two to three weeks, you should see new roots forming. If the cuttings are in soil, give them a gentle tug—resistance means roots have started to grow.
Care and Maintenance of Young Rosemary Plants
Once the cuttings have rooted and been transplanted into a larger container or directly into the garden, rosemary becomes relatively low-maintenance. But like any herb, it does have its preferences.
Light: Rosemary loves sunlight. I place my pots in the sunniest part of the garden or near a south-facing window if I’m keeping them indoors. Aim for 6–8 hours of direct sunlight daily.
Watering: This herb is drought-tolerant once established, but young plants still need regular moisture. I water when the top inch of soil feels dry and make sure any excess water drains out. Overwatering is the most common reason rosemary plants fail.
Soil: I always plant rosemary in well-draining soil. A mix of cactus potting soil and compost works wonderfully. If the soil stays too wet, the roots will rot.
Fertilizing: I usually fertilize lightly every month with a balanced organic fertilizer, especially during the growing season. Don’t go overboard—too much nitrogen can make the plant leggy and reduce the essential oil content in the leaves.
Pruning: Once the plant has grown a bit, I start pruning regularly to encourage bushiness. I snip the tips often, especially when I’m cooking, and avoid cutting more than a third of the plant at once.
Pests & Diseases: Rosemary is fairly pest-resistant, but occasionally I’ll notice spider mites or aphids. A quick blast of water or a gentle spray of neem oil typically handles the issue. Good air circulation helps prevent mildew and other fungal problems.
Harvesting Rosemary
There’s no better feeling than stepping out onto the balcony or into the garden and snipping fresh rosemary for dinner. I start harvesting lightly once the plant is well-established—usually after a few months of growth.
I cut stems just above a leaf node to encourage branching, and I always leave enough growth behind so the plant can continue to thrive. During the growing season, I’ll harvest regularly. In colder months, especially if the plant is indoors, I harvest more sparingly.
If you end up with more rosemary than you can use fresh, you can dry it easily by bundling and hanging it in a dry, warm place—or use a dehydrator. I also love infusing rosemary into olive oil or vinegar, or freezing the sprigs in ice cube trays with a bit of water or broth for winter cooking.
Final Thoughts
Growing rosemary from cuttings is one of those small gardening joys that keeps on giving. Once you get the hang of it, it becomes second nature—and your kitchen will thank you for the constant supply of fragrant, flavorful herbs. I’ve propagated dozens of rosemary plants over the years this way, and I still get excited every time I see those tiny roots begin to form.
If you’ve never tried it before, I encourage you to give it a go. It’s simple, satisfying, and surprisingly fun. Before long, you’ll not only have rosemary for all your culinary needs but also extra plants to share with fellow gardeners.