Roses have always felt like royalty in the garden—elegant, fragrant, and timeless. I used to think that growing them required advanced skills, or at least a trip to the nursery and a good chunk of change. But then I learned how to grow roses from cuttings, and everything changed. Suddenly, I was growing my favorite rose varieties for free—right from my own backyard or even from a neighbor’s prized bush (with permission, of course!).
If you’ve ever wanted to multiply a beloved rose bush or start your own rose garden without spending a lot, propagation from cuttings is the way to go. It’s surprisingly doable, even if you’re new to gardening. Let me walk you through how I do it—step by step, with real results.
Why Propagate Roses from Cuttings?

Roses grown from cuttings are true to the parent plant, which means you’ll get the same color, fragrance, and growth habit as the original bush. This is especially great if you’re growing heirloom varieties or have a sentimental plant that’s not available in nurseries.
Another reason I love this method? It’s affordable. No need to buy expensive new rose plants when you can propagate your favorites. Plus, there’s something deeply satisfying about growing a strong, blooming rose from what started as a single stem.
When to Take Rose Cuttings
I’ve had the most success taking rose cuttings in late spring through early summer, when the stems are semi-soft (also called softwood or semi-hardwood). They’re firm enough to hold shape but still flexible and green. Autumn cuttings can work too, but they usually take longer to root and need extra protection from cold.
I like to take my cuttings early in the morning, when the plant is fully hydrated and temperatures are still mild.
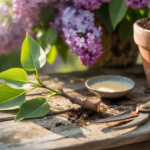
What You’ll Need
Here’s what I gather before getting started:
- Sharp, sterilized pruners or garden scissors
- Rooting hormone powder or gel (optional but helpful)
- Pots or deep seed trays
- Well-draining soil (I use a mix of peat moss and perlite or sand)
- A clear plastic bag, humidity dome, or large jar
- Spray bottle with water
- Labels (if taking multiple varieties)
How I Grow Roses from Cuttings
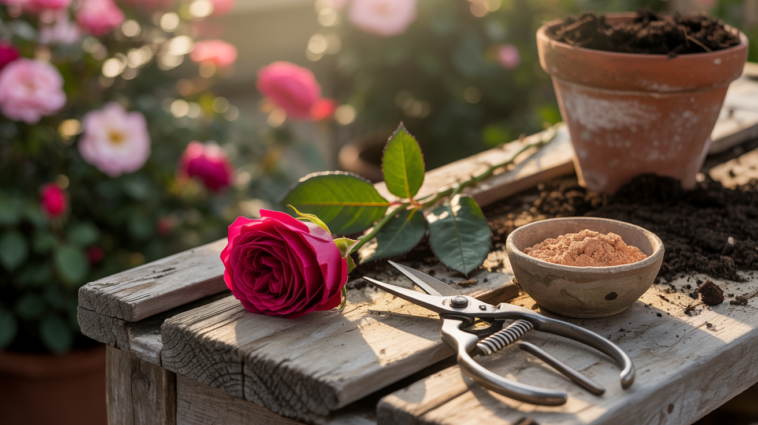
1. Choose the Right Stem
I look for a healthy stem that has recently finished blooming. It should be about 6–8 inches long, with several sets of leaves, and free of any pests or disease. I make a clean cut just below a node (where a leaf meets the stem), since that’s where roots are most likely to form.
If I’m working with multiple types of roses, I label each cutting so I know what’s what later on.
2. Prepare the Cutting
I remove the lower leaves and any flowers or buds, leaving just the top one or two sets of leaves. This helps the cutting focus all its energy on forming roots, rather than supporting unnecessary foliage.
Next, I gently scrape the outer layer of skin on one side of the stem near the base—just enough to expose a bit of the green underneath. This helps trigger root growth. I dip the base in rooting hormone to encourage faster, more successful rooting.
3. Plant the Cutting
I fill a pot or tray with a moist mix of peat moss and perlite. Using a stick or pencil, I make a hole and insert the cutting about halfway into the soil. Then I firm the soil gently around the stem so it stands upright.
For extra stability, I often group 3 or 4 cuttings in one pot, spaced out just enough so their leaves aren’t touching.
4. Create Humidity
This is one of the most important steps. Rose cuttings need high humidity to root successfully. I lightly mist the cutting with water, then cover the pot with a clear plastic bag or place it under a humidity dome. A large glass jar also works wonderfully if you’re only rooting one or two stems.
I place the pot in a warm, bright location with indirect sunlight. Direct sun can dry the cuttings out too quickly, so I usually keep them in a sheltered spot on my porch or near a bright window indoors.
5. Water and Wait
I check on my cuttings every couple of days to make sure the soil stays evenly moist—not soggy—and that there’s no mold or rot. If the plastic covering fogs up too much, I open it for a few minutes to let in some fresh air.
After about 3–5 weeks, I gently tug on the cutting. If there’s resistance, roots are forming! If it slides right out, I give it more time. Patience is key here—some rose varieties take a little longer than others.
Potting Up and Planting Out
Once I see a strong root system—usually when roots are 1–2 inches long—I carefully transplant the cutting into its own pot with rich, well-draining soil. I keep it in a sheltered location and let it grow stronger for a few more weeks.
If I started the process in spring or early summer, I plant it directly in the garden in early fall. For autumn cuttings, I keep them in pots through the winter, protected from frost, and transplant them in spring once the threat of freezing has passed.
My Tips for Success
- Take more than one cutting: Not all of them will root, so it’s smart to try a few at once.
- Use semi-hardwood stems: They root more reliably than woody or overly soft stems.
- Avoid overwatering: It’s better to mist than to drench—too much water causes rot.
- Be patient and observant: Check regularly, but don’t disturb the cuttings unless necessary.
- Celebrate small wins: Even rooting one cutting successfully is a big accomplishment!
Final Thoughts
Growing roses from cuttings has been one of the most rewarding gardening adventures I’ve ever taken on. There’s something incredibly special about seeing a rose bush flourish, knowing you grew it from a simple stem with your own two hands. It makes each bloom feel a little more meaningful, and each garden stroll a little more personal.
If you’ve got a rose you love—or one you admire in a neighbor’s yard—I encourage you to give this method a try. It’s budget-friendly, therapeutic, and opens the door to a garden full of roses that are truly yours, from the very beginning.
Happy gardening, and may your roses root beautifully!