I’ve always had a special place in my heart (and my kitchen) for oregano. This fragrant herb is one of those plants that seems to grow effortlessly once it’s established, and I’ve used it in everything from homemade pizza to savory pasta sauces. But the best part? Growing oregano is incredibly easy, and you don’t even need seeds to get started. I’ve had great success growing oregano from cuttings, and it’s honestly one of my favorite propagation methods.
If you’ve ever been gifted a sprig of oregano or if you have a plant that’s outgrown its pot, you can take cuttings and grow new oregano plants in no time. Let me walk you through how I do it and give you all the tips and tricks you’ll need to ensure your new oregano plants thrive.
Choosing the Right Container for Rooting Oregano

I’ve found that oregano is quite adaptable when it comes to containers, but it does prefer good drainage. I start by choosing a small pot or container, around 4 to 6 inches in diameter, with drainage holes at the bottom. For rooting cuttings, I often use a small glass of water, which makes it easier to see when the roots start to develop.
Once the cuttings have rooted, I transfer them to a larger pot, typically around 10 to 12 inches wide, with well-draining soil. I love using terracotta pots because they help keep the soil from staying too moist, which oregano doesn’t like. But you can use plastic or ceramic pots as long as they have drainage holes to keep the roots healthy.
Picking the Right Oregano Variety
Oregano comes in several varieties, and while all of them root well from cuttings, some varieties are better suited to different climates and uses. I’ve had success with several types of oregano, but here are a few that I recommend based on my experiences:
- Greek Oregano – A classic variety that’s perfect for Mediterranean dishes. It has a strong flavor and is relatively hardy.
- Italian Oregano – Slightly milder than Greek oregano, great for pizza sauces and Italian cooking.
- Mexican Oregano – If you’re a fan of Mexican cuisine, this variety is a must. It has a slightly citrusy and peppery flavor that works great in chili and tacos.
- Golden Oregano – A decorative variety with golden leaves that still offers the signature oregano flavor. It’s perfect if you’re growing it in a container garden or as an ornamental herb.
Once you decide on the variety that suits your taste and climate, you’re ready to get started with propagation.
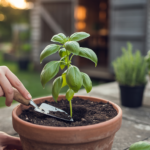
Taking and Rooting Oregano Cuttings
The best time to take oregano cuttings is in late spring or early summer when the plant is actively growing. I’ve found that cutting healthy, non-flowering stems works best. Here’s how I do it:
- Select healthy stems – I always choose fresh, green, non-woody stems that are free from pests or disease. I typically take cuttings that are around 4 to 6 inches long, and I make sure to snip just below a leaf node (the spot where leaves are growing from the stem).
- Strip off the lower leaves – I gently remove the leaves from the bottom 2–3 inches of the cutting. This is where the roots will eventually grow, so leaving this area clear of leaves helps prevent rot.
- Optional: Use rooting hormone – While oregano is relatively easy to root without hormone, I like to dip the cut end of the stem in rooting hormone powder to speed up the process. This step is optional but can improve your success rate.
- Place the cutting in water or soil – For rooting, you have two options: water or soil. I’ve rooted oregano in both, but my preferred method is to start it in water. I place the cuttings in a glass of water, ensuring the bottom 2 inches are submerged. If you prefer soil, you can plant the cutting directly in a small pot filled with well-draining potting mix.
If you’re using water, change the water every 2–3 days to keep it fresh. I usually see roots beginning to form within a week or so, and once the roots are about 1 to 2 inches long, I know it’s time to transplant the cuttings into soil.
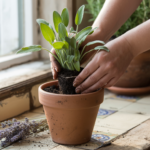
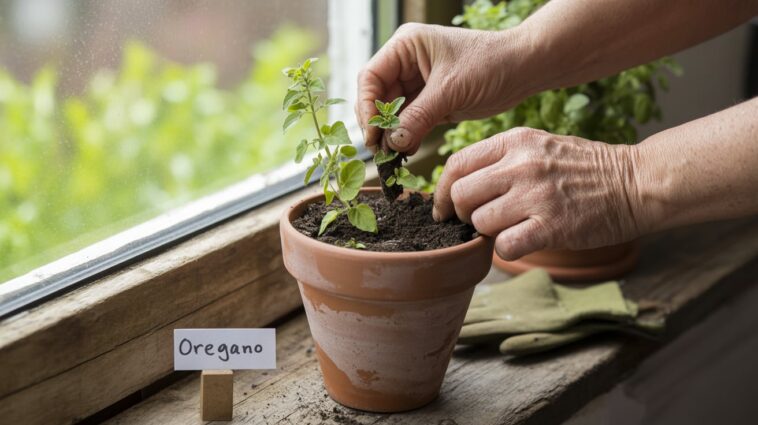
Transplanting and Caring for Oregano Cuttings
Once your oregano cuttings have developed a good root system, it’s time to transfer them into soil. Oregano is relatively easy to care for once it’s established, and I’ve had great success keeping my plants happy with minimal fuss. Here’s how I take care of my new oregano plants:
Light: Oregano thrives in full sunlight, and I always place my pots in a location that gets 6–8 hours of direct sunlight each day. If you’re growing oregano indoors, a south-facing window is ideal. In the colder months, I supplement with a grow light if needed.
Watering: Oregano is a drought-tolerant herb, which means it doesn’t require frequent watering. I water my oregano plants when the top inch or so of the soil feels dry. When I do water, I give them a thorough soaking, making sure the excess water drains out of the pot. I’ve found that overwatering oregano is one of the quickest ways to damage the plant, so it’s better to err on the side of underwatering.
Soil: Oregano prefers well-draining soil. I use a mixture of regular potting soil and perlite to ensure good drainage. If the soil holds too much water, the roots can rot, so adding perlite or sand helps with aeration.
Fertilizing: Oregano doesn’t need much fertilizing. I usually apply a light, balanced organic fertilizer every 4 to 6 weeks during the growing season. During the winter months, I reduce fertilization since the plant is dormant. I’ve found that too much nitrogen can lead to leggy growth, so I keep fertilizing to a minimum.
Pruning and Harvesting: Once my oregano plants have grown a bit, I start pruning them regularly to encourage bushy growth. I pinch back the tops of the stems to promote branching and a fuller plant. When harvesting, I always cut a few leaves at a time, leaving the rest of the plant to keep growing. I avoid cutting more than one-third of the plant at once to allow it to recover.
Troubleshooting Common Oregano Issues
Oregano is a relatively pest- and disease-resistant plant, but there are a few things to keep an eye on:
- Pests: Occasionally, I’ll notice aphids or spider mites on my oregano plants. I use a gentle spray of insecticidal soap or neem oil to deal with pests. A strong spray of water can also knock off the critters.
- Mildew or Fungal Issues: Oregano prefers dry conditions, and I’ve found that poor air circulation can lead to mildew. I always make sure my oregano has plenty of space to grow and that the leaves aren’t staying damp for too long.
- Leggy Growth: If your oregano starts to look spindly or leggy, it’s likely not getting enough sunlight. I move my plants to a sunnier spot or supplement with grow lights. Pruning the leggy stems can also help encourage new, healthier growth.
Final Thoughts
Growing oregano from cuttings is a straightforward and rewarding process that any gardener can do—even beginners. Once you get the hang of it, you’ll have fresh oregano year-round, ready for everything from soups to pizzas and even teas. I love the satisfaction of snipping a few leaves from a plant I grew myself and using them in my cooking. Plus, I now have several thriving oregano plants that I’ve propagated from cuttings—proof that patience and a little gardening know-how can go a long way.
If you’re looking for a hassle-free herb to grow in your garden or on your windowsill, oregano is a fantastic choice. So grab a few sprigs, start rooting, and watch your garden grow!