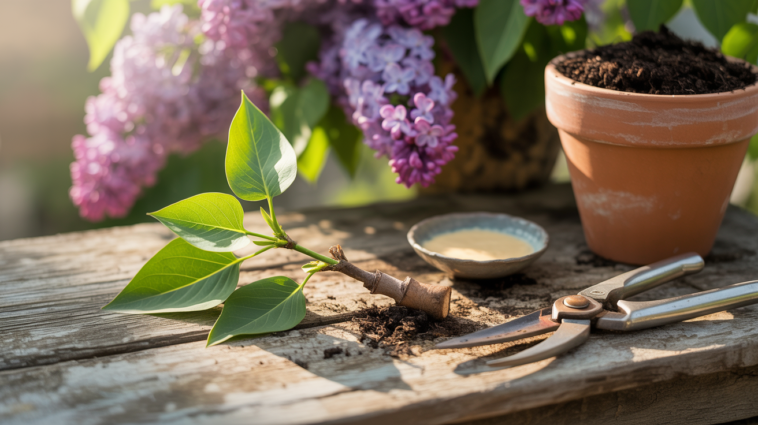
There’s something undeniably nostalgic about lilacs. Their sweet, intoxicating scent takes me right back to my childhood, when I’d wander through my grandmother’s backyard each spring, mesmerized by the tall lilac bushes in full bloom. Years later, when I had my own garden, growing lilacs was one of the first things on my list—and instead of buying new plants, I decided to try propagating them from cuttings. To my delight, it worked beautifully.
Growing lilacs from cuttings is not only practical and rewarding—it’s also a lovely way to carry on a plant’s legacy. If you’ve ever admired a friend’s lilac bush or wanted to replicate an heirloom variety, cuttings are the perfect solution. Let me walk you through exactly how I do it.
Why Grow Lilacs from Cuttings?

Lilacs are traditionally propagated by suckers or grafting, but I’ve found that growing them from softwood cuttings is surprisingly effective—and a lot simpler than it sounds. Taking cuttings lets you clone a specific plant, ensuring you get the same flower color, fragrance, and growth habit.
Plus, it’s incredibly satisfying to watch a twig-like cutting slowly become a full-size shrub that blooms every spring. It’s a little slower than transplanting a sucker, but well worth the patience.
Best Time to Take Lilac Cuttings
Timing is everything when it comes to lilac propagation. The ideal window is late spring to early summer, shortly after the lilac has finished blooming. This is when softwood—the young, flexible new growth—appears. Softwood cuttings root much more easily than older, woody branches.
I usually take my cuttings early in the morning when the plant is well-hydrated and the temperatures are still mild. It’s a peaceful time of day in the garden, and the plants seem to appreciate it too.
What You’ll Need
Before you start, gather your tools:
- Sharp, clean pruning shears or scissors
- Rooting hormone powder or gel (optional but recommended)
- Small pots or containers
- A mix of peat moss and perlite, or a light, well-draining potting mix
- Clear plastic bags or a humidity dome
- A spray bottle for misting
- A pencil or stick to make planting holes
Step-by-Step: How I Propagate Lilacs from Cuttings
1. Select the Right Stem
Look for a healthy, non-flowering stem that’s about 4–6 inches long. It should be green and flexible but not too soft or floppy. I always avoid stems with flower buds since they put more energy into blooming than rooting.
I snip the stem just below a leaf node, which is where roots are most likely to form. It’s important that your cutting is free of disease or insect damage.
2. Prepare the Cutting
Once I’ve made the cut, I strip off the lower leaves, leaving just the top one or two pairs. If the remaining leaves are large, I cut them in half to reduce water loss. The goal is to help the cutting retain moisture while it roots, without overworking it.
I then dip the bottom of the stem in rooting hormone. This step isn’t required, but I’ve had much better success when I use it. It encourages faster root development and protects the cut from rot or infection.
3. Plant the Cutting
I fill a small container with a mix of peat moss and perlite (about 50/50). This combination holds moisture while also allowing air to reach the developing roots.
Using a pencil, I poke a hole into the soil and gently insert the cutting. Then I firm the soil around it, making sure the leaf node is buried and the cutting stands upright.
4. Create a Humid Environment
Humidity is key. Without roots, cuttings can dry out quickly. I lightly mist the cutting with water and cover the pot with a clear plastic bag or place it under a plastic dome. If you use a bag, make sure it doesn’t touch the leaves—prop it up with sticks if needed.
Then, I set the cutting in a warm, bright area out of direct sunlight. Bright, indirect light helps the cutting root without overheating or drying out.
5. Wait and Watch
This is the hardest part: waiting. I check the cutting every few days to make sure the soil stays moist (but not soggy) and that no mold is forming. If there’s condensation inside the bag or dome, I open it briefly to allow air in.
After 3 to 6 weeks, I gently tug on the cutting. If I feel resistance, that’s a good sign that roots have started forming.
Transplanting and Growing On
Once the cutting has a healthy set of roots (about 1 to 2 inches long), I transplant it into a larger pot with regular potting soil. From here, I let the new lilac grow for the rest of the season in a sheltered spot—like a porch or partially shaded area of the garden.
I usually wait until the following spring to plant my propagated lilacs in the ground, especially if I took the cutting late in the season. By then, the plant is stronger and better prepared to handle outdoor conditions.
A Few Tips from My Experience
- Take multiple cuttings: Not every cutting will root, so I always take 4–6 at a time.
- Keep them labeled: If you’re propagating more than one lilac variety, label each pot to avoid confusion later.
- Avoid overwatering: While cuttings need moisture, soggy soil can cause rot. Use a spray bottle instead of a watering can when in doubt.
- Be patient: Lilacs can be slow to root. If your cutting looks green and healthy, don’t give up too soon.
Final Thoughts
There’s something so special about growing a lilac from a cutting—maybe because you’re part of its entire journey from a simple stem to a blooming shrub. Every time I walk by a lilac bush I propagated myself, I feel an extra sense of pride. It’s like a living memory, rooted in time and place.
If you’ve got a lilac you love, or you want to try propagating one from a friend’s garden, don’t hesitate. With just a little care and patience, you’ll have new lilacs to call your own—fragrant, beautiful, and entirely grown by you.
Happy planting!


