I fell in love with lemon thyme the very first time I crushed a sprig between my fingers. The scent—bright, citrusy, and just a little savory—was enough to stop me in my tracks. It was like bottling up a summer afternoon and tucking it into your pocket. I couldn’t believe I’d gone so long without growing it.
These days, lemon thyme is a permanent resident in my herb garden—and the best part? You don’t need to buy a new plant every season. Once you’ve got one healthy stem, you can propagate an entire pot full just from cuttings. It’s an easy, satisfying way to multiply this fragrant herb and keep it within reach year-round.
Let me take you through exactly how I grow lemon thyme from cuttings—step by aromatic step.
Why Grow Lemon Thyme?
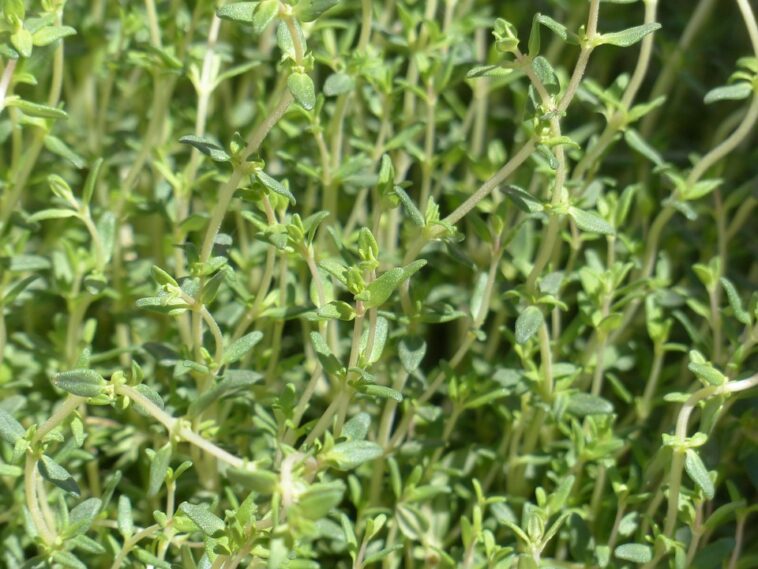
Before we dive in, let’s talk about what makes lemon thyme so special. It’s a variety of common thyme (Thymus citriodorus), but it carries a unique, zesty lemon scent that sets it apart. The leaves are small and delicate, the stems woody but not tough, and the flavor is perfect for everything from grilled chicken to salad dressings and even roasted potatoes.
Beyond the kitchen, lemon thyme is a lovely ornamental herb. It grows into a low, bushy mound with tiny pale green leaves and delicate pink or lavender flowers that bees absolutely adore. And best of all, it’s drought-tolerant, low-maintenance, and ideal for containers.
Step 1: Snipping the Right Cutting
I usually take cuttings in spring or early summer when the plant is full of energy and new growth. Choose a healthy, non-flowering stem that’s about 3 to 5 inches long. I look for ones that are firm but still flexible—green at the tips but just starting to mature near the base.
Using a clean pair of scissors or garden snips, I make a cut just below a leaf node. Then, I gently strip off the bottom two inches of leaves, leaving a little bare stem to insert into the soil or water.
Pro tip: If the weather’s really hot, I take my cuttings early in the morning when the plant is hydrated and the oils are most concentrated. The cuttings seem to bounce back quicker that way.
Step 2: Rooting in Water or Soil
You can root lemon thyme cuttings in either water or soil, and I’ve done both. Here’s what I’ve found:
Rooting in Water:
This is the easier method for beginners. Just pop the cutting into a glass of water, making sure only the bare stem is submerged (not the leaves), and place it on a bright windowsill out of direct sunlight. Change the water every two days to keep it clean.
Within a week or two, you’ll start to see tiny white roots forming at the nodes. When the roots are about an inch long, it’s time to transplant them into soil.
Rooting in Soil:
For a more direct route, you can plant your cutting straight into a pot with moist, well-draining soil. I like to use a mix of potting soil and perlite or coarse sand to mimic the dry, rocky conditions thyme prefers.
After planting, I mist the cuttings lightly and cover the pot with a clear plastic bag or humidity dome to create a little greenhouse. Just don’t let the plastic touch the leaves—prop it up with skewers or sticks if needed. I open the cover for a few minutes daily to allow airflow and prevent mold.
With this method, the roots develop directly in soil, which makes for an easier transition later on.
Step 3: Transplanting and Settling In
Once your cutting has developed roots—either in water or directly in the pot—you can transplant it into its own container or garden spot. I usually start with a 4-inch pot filled with well-draining soil. Lemon thyme really hates soggy roots, so I always make sure my pots have drainage holes and that the mix is nice and loose.
Place your pot in a sunny location. This herb loves light—at least six hours of direct sun a day. If you’re growing indoors, a south-facing window or a grow light will do wonders.
During the first few weeks, I keep the soil lightly moist but not wet. Once the plant takes off and new growth appears, I cut back on watering and only give it a drink when the top inch of soil is dry.
Step 4: Ongoing Care and Harvesting
Lemon thyme is incredibly easy once established. It doesn’t need much—just sun, air, and occasional water. It thrives on a bit of neglect, which makes it perfect for busy or forgetful gardeners like me.
Watering:
Let the soil dry out between waterings. Overwatering is the most common mistake—especially in cooler months.
Pruning:
Regular pruning keeps the plant bushy and healthy. I harvest by snipping just above a leaf node, which encourages branching. I avoid cutting into the woody parts at the base—thyme doesn’t bounce back well from harsh cuts.
Fertilizing:
I rarely fertilize thyme, but if I do, it’s with a diluted organic liquid fertilizer once a month during peak growing season. Too much nitrogen will give you lots of leaves but dilute the flavor.
Step 5: Enjoying Your Lemon Thyme
There’s something so satisfying about stepping outside and snipping fresh herbs for dinner. I use lemon thyme in almost everything—it brightens up marinades, pairs beautifully with fish, and adds depth to soups and stews. Sometimes I just crush a leaf between my fingers while I’m watering the garden for a little burst of aromatherapy.
I also dry sprigs by tying them in bundles and hanging them upside down in a cool, dark place. Once dry, I crumble the leaves into a jar and keep them handy in the kitchen. The flavor isn’t quite as intense as fresh, but it still packs a lovely citrusy punch.
Final Thoughts
Growing lemon thyme from cuttings has become one of my favorite gardening rituals. There’s something incredibly grounding about turning a small sprig into a thriving plant. It’s like nature’s quiet reminder that even the tiniest things—given time, light, and care—can flourish.
So if you’ve got a sunny windowsill or a corner of the balcony to spare, give lemon thyme a try. Start with one cutting and watch it grow into a fragrant, cheerful mound of flavor and beauty. You might find, like I did, that it becomes one of your most treasured garden companions.