There’s something about hydrangeas that never fails to draw me in. Maybe it’s the huge, globe-like flower heads in dreamy shades of blue, pink, or white, or maybe it’s their old-fashioned charm that reminds me of peaceful summer mornings in the garden. Whatever it is, I’ve always had a soft spot for these classic blooms. Over the years, I’ve learned that hydrangeas are not only beautiful and rewarding to grow—they’re also surprisingly easy to propagate from cuttings.
In this post, I’ll walk you through how I grow hydrangeas from cuttings—step by step. Whether you’re looking to multiply your favorite variety, share plants with friends, or fill your garden with more blooms without buying new plants, this method is a wonderful (and budget-friendly) way to do it.
Why Grow Hydrangeas from Cuttings?
I started taking cuttings mostly because I wanted more hydrangeas than my budget could handle. When I realized how easy it was to root new plants from my existing bushes, I was hooked. Not only is it cost-effective, but propagating from cuttings also ensures that the new plants will be exact clones of the parent plant. That’s especially important if you have a favorite variety with a specific bloom color, size, or growth habit you want to replicate.
And the best part? You don’t need a greenhouse or fancy equipment. Just a healthy hydrangea, a pair of clean scissors, and a bit of patience.
When to Take Hydrangea Cuttings
In my experience, the best time to take cuttings is in late spring to early summer, once the plant has flushed out fresh new growth but before it begins to harden off. This new, flexible growth is called “softwood,” and it roots much more easily than older, woody stems.
I usually aim for a slightly overcast morning, when the plant is well-hydrated, and the temperatures aren’t scorching. Taking cuttings during the heat of the day can cause them to wilt quickly and reduce the chances of success.
Step-by-Step: Taking and Rooting Hydrangea Cuttings
1. Choose a Healthy Stem
First, I inspect my hydrangea plant and look for a strong, non-flowering stem with several sets of leaves. I avoid any stems that already have flower buds—those put more energy into blooming than rooting.
Using clean, sharp pruners, I cut a 4- to 6-inch section from the tip of a healthy stem, just below a leaf node. That node is where roots are most likely to form.
2. Remove Lower Leaves
Next, I strip off the bottom leaves from the cutting, leaving just the top one or two pairs. Removing the lower leaves helps reduce moisture loss and makes it easier to plant the cutting without burying any foliage.
If the remaining leaves are large, I often cut them in half crosswise to reduce surface area and limit transpiration. This helps the cutting stay hydrated while it’s busy forming roots.
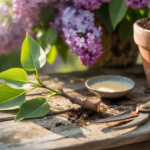
3. Dip in Rooting Hormone (Optional but Helpful)
I keep rooting hormone powder on hand because I’ve found it really improves the success rate for hydrangeas. After trimming the cutting, I dip the cut end in water, then into the rooting powder, tapping off any excess.
It’s not absolutely necessary—hydrangeas can root without it—but if you’re serious about maximizing your chances, it’s worth the step.
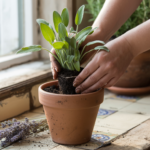
4. Plant the Cutting
For planting, I use a mix of half perlite and half peat moss (or sometimes a well-draining potting mix). I fill a small plastic pot with the mix, then use a pencil to poke a hole a few inches deep.
I gently insert the cutting into the hole and firm the soil around it. You want to make sure the leaf nodes (where the lower leaves were removed) are buried, as that’s where the roots will grow from.
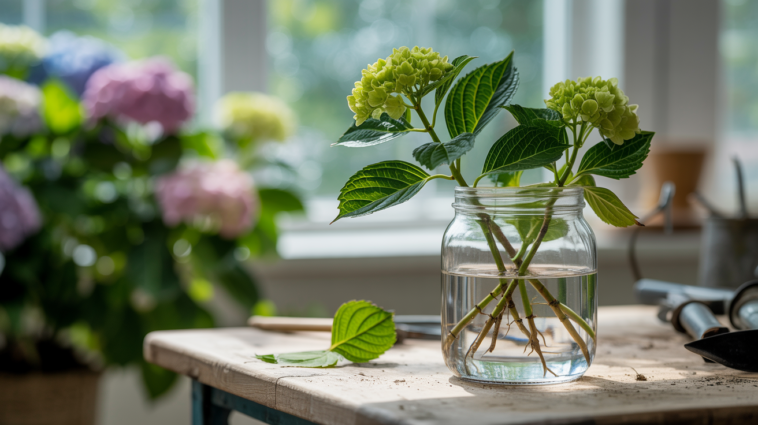
5. Water and Cover
Once the cutting is planted, I give it a good watering to settle the soil. Then comes the crucial step: humidity. Young cuttings lose moisture fast, so I cover the pot with a plastic bag or place it in a clear container with a lid to create a mini greenhouse effect.
I just make sure the plastic doesn’t touch the leaves—it can cause rot. Sometimes I use sticks or skewers to hold the bag up if needed.
6. Provide the Right Conditions
I place the potted cutting in bright, indirect light—never direct sun—and keep it warm (around 65–75°F is ideal). I check it every few days to make sure the soil stays moist (not soggy) and that no mold is forming.
After about 2 to 4 weeks, I start checking for resistance by gently tugging on the stem. If it resists, that means roots have begun to form!
Transplanting and Growing On
Once the cutting has a solid root system (usually after about 4–6 weeks), I transplant it into a slightly larger pot with regular potting soil and let it grow for a bit longer in a protected area—like a porch or shaded garden bed.
I usually wait until the following spring to plant the new hydrangea in the ground, giving it time to establish. That said, if you live in a warm climate and take your cuttings early in the season, you may be able to transplant them in fall before frost sets in.
A Few Extra Tips from Experience
- Keep more than you need: Not every cutting will root, so I always take a few extra.
- Label your cuttings: If you’re propagating more than one variety, it’s easy to forget which is which.
- Be patient: Some cuttings take longer to root than others. As long as the stem stays green and firm, don’t give up.
- Overwintering: In colder zones, I keep my new hydrangeas in containers through winter in a sheltered spot or bring them indoors to avoid frost damage.
Final Thoughts
Growing hydrangeas from cuttings has become one of my favorite ways to expand my garden. There’s something incredibly satisfying about watching a small snip of stem grow into a full, blooming plant. It’s not just about saving money—though that’s a nice bonus—it’s about creating something new from something you already love.
If you haven’t tried it yet, give it a go this season. You might find yourself falling in love with the process just as much as the flowers.
Happy gardening!