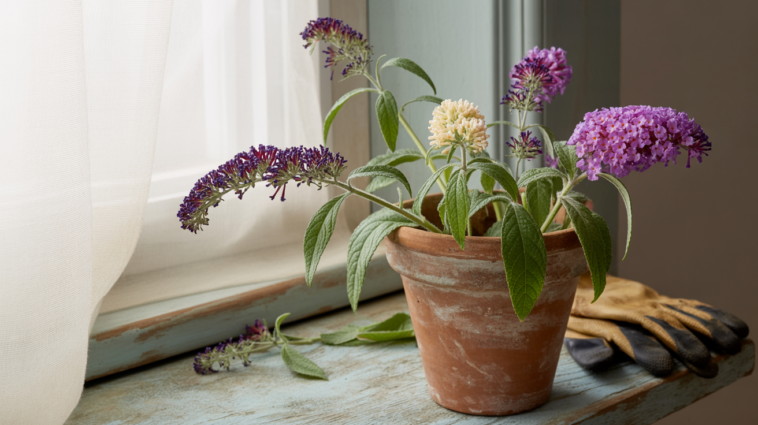
Butterfly bushes, or Buddleia, are an irresistible addition to any garden, attracting not only butterflies but also hummingbirds and bees. Their vibrant, cone-shaped flowers in shades of purple, pink, and white bloom all summer long, adding both beauty and life to the garden. For years, I admired these plants from afar, but once I learned how to grow butterfly bushes from cuttings, I realized how easy it is to share the magic of these pollinator-friendly plants with others.
If you’re looking to add more butterfly bushes to your garden without spending money at the nursery, growing them from cuttings is a fantastic solution. Whether you’re aiming to multiply your favorite varieties or share some cuttings with friends, I’ll walk you through how I propagate my butterfly bush using simple, easy-to-follow steps.
Why Grow Butterfly Bush from Cuttings?
There are several benefits to propagating butterfly bushes from cuttings. First and foremost, it’s a cost-effective way to expand your garden. You can grow as many plants as you like from just a few cuttings, saving money on nursery plants.
Another great perk is that the cuttings you take will be genetically identical to the parent plant. This means you’ll get the same vibrant blooms and growth habits as the original bush—perfect if you’ve got a specific butterfly bush variety you love.
And finally, it’s an incredibly rewarding process. Watching a cutting transform into a full-grown bush that attracts butterflies (and all sorts of other pollinators) is one of the most satisfying experiences in the garden.
When to Take Butterfly Bush Cuttings
The best time to take butterfly bush cuttings is in late spring or early summer when the plant is actively growing. You want to choose semi-softwood stems—these are stems that are not too woody, but firm enough to hold shape. This is the stage when butterfly bushes are most likely to root successfully.
I prefer to take my cuttings in the morning after the plant has had time to hydrate overnight, and before the sun gets too hot. This gives the plant the best chance of making a smooth transition to life as a new plant.
What You’ll Need
Here’s what I gather before I start propagating my butterfly bushes:
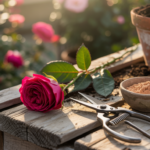
- Clean, sharp pruning shears or garden scissors
- Rooting hormone (optional but helps with quicker root growth)
- A small container or tray for planting
- Well-draining potting mix (a mix of peat moss and perlite works well)
- Clear plastic bag, humidity dome, or plastic wrap
- A spray bottle to mist the cuttings
- Labels for identifying different varieties (if needed)
How to Propagate Butterfly Bush from Cuttings
1. Select the Right Stem
The first step is to choose a healthy stem from the butterfly bush. I look for a non-flowering, semi-softwood stem, about 4 to 6 inches long. I make sure the cutting is free of disease or pests, as these can affect the success of rooting.
I always cut just below a node (the point where leaves are attached to the stem). Nodes are where the roots will develop, so it’s important to have a good, clean cut there.
2. Prepare the Cutting
Once the cutting is made, I remove the lower leaves, leaving just the top 2 or 3 leaves. This reduces the amount of moisture the cutting will lose while it’s establishing roots.
I dip the base of the cutting into rooting hormone. This step is optional, but I’ve found that rooting hormone speeds up the rooting process and helps to ensure more successful cuttings. After dipping, I shake off the excess powder.
3. Plant the Cutting
Next, I fill a small pot or tray with a well-draining potting mix. I use a mix of peat moss and perlite because it’s light and holds moisture well without becoming too soggy. I make a hole in the soil with a pencil or stick, then gently insert the cutting into the hole.
I make sure that the bottom of the cutting is at least an inch deep in the soil. Once the cutting is in place, I gently firm the soil around it to hold it upright and stable.
4. Create a Humid Environment
Now comes the important part: keeping the cutting in a high-humidity environment to encourage rooting. I lightly mist the cutting with a spray bottle, then cover the pot with a clear plastic bag or place it under a humidity dome. If I’m using plastic wrap, I make sure it doesn’t touch the leaves.
I place the pot in a warm, bright location but out of direct sunlight. Direct sun can cause the cutting to dry out too quickly. A warm windowsill works well, but I also use a shady spot outdoors where the temperature stays mild.
5. Water and Wait
I check on my cutting every few days, making sure the soil stays moist but not soggy. Overwatering can cause rot, so I prefer to mist the cutting rather than watering directly.
After 3 to 4 weeks, I gently tug on the cutting. If I feel resistance, that means roots have formed! If the cutting slides out easily, I give it more time. It’s important to be patient, as some cuttings may take longer than others to root.
Transplanting and Growing On
Once my cutting has developed a healthy root system (usually about 1 to 2 inches of roots), I transplant it into a larger pot with regular potting soil. From here, I let the new butterfly bush grow for the remainder of the growing season.
If I took the cutting early enough in the season, I can plant it directly in the garden after it’s had time to establish itself in the pot. If I took the cutting in late summer, I keep the new plant in its pot through the winter and plant it outside the following spring.
A Few Tips for Success
- Take multiple cuttings: Not every cutting will root, so I always take more than one.
- Choose healthy stems: The cutting should be free of disease, pests, and damage.
- Be patient: Rooting can take several weeks, so don’t rush it!
- Water properly: Mist, don’t soak. Soggy soil can lead to rot.
- Provide warmth and light: Keep your cuttings in a warm, bright spot but out of direct sunlight.
Final Thoughts
Growing butterfly bushes from cuttings has been one of the most satisfying things I’ve done in my garden. There’s something special about watching a small cutting transform into a full-grown bush that will attract butterflies year after year.
If you’re looking to expand your garden with some beautiful butterfly-friendly plants, I highly recommend giving this method a try. It’s simple, cost-effective, and gives you a great way to propagate your favorite varieties without breaking the bank.
Happy gardening, and may your garden always be full of fluttering wings!