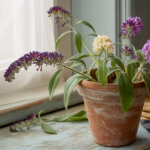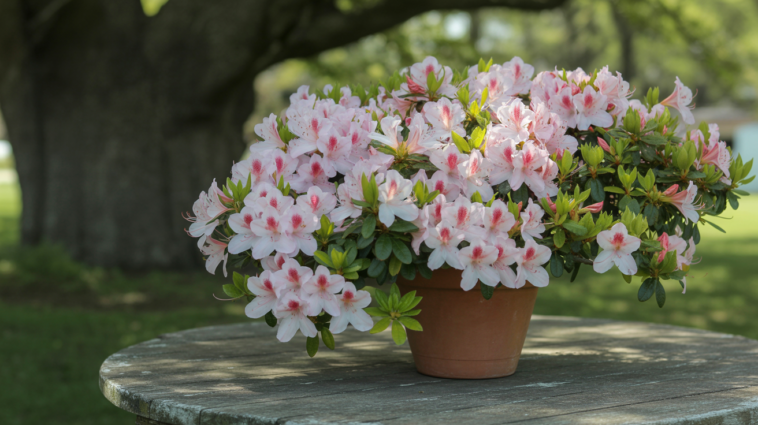
Azaleas have always held a special place in my garden. Their vibrant blooms, lush foliage, and graceful branching habit make them one of my favorite shrubs. For years, I relied on buying young azaleas from nurseries, but once I discovered how to grow azaleas from cuttings, my gardening experience changed entirely. It’s an affordable, satisfying way to multiply your favorite azalea varieties—and the process is easier than you might think.
In this post, I’ll walk you through how I take cuttings from my azalea shrubs, root them successfully, and eventually transplant them into my garden or containers. If you’ve ever wanted to grow more azaleas for less—or even preserve a cherished plant—you’re in the right place.
Why Grow Azaleas from Cuttings?

Propagating azaleas from cuttings offers several big benefits. For one, it’s far more economical than buying new plants, especially if you’re trying to create a large border or hedge. It also allows you to replicate specific varieties you love—whether it’s a rare heirloom or just a particular color that complements your garden beautifully.
For me, growing azaleas from cuttings is about connection. I’ve propagated azaleas from my grandmother’s garden, and there’s something deeply meaningful about seeing those same blossoms flourish in my own yard.
When to Take Azalea Cuttings
The best time to take azalea cuttings is during late spring through early summer, when new growth has begun to harden slightly. These are called semi-hardwood cuttings—stems that are firm but still flexible.
I’ve also had success taking cuttings in early autumn, especially in warmer climates where winters are mild. The key is to avoid the heat of midsummer and the deep cold of winter.
What You’ll Need
Before I start, I always gather the essentials. Having everything ready makes the process smoother and helps prevent the cuttings from drying out while I work.
Here’s what I use:
- Sharp pruning shears or garden scissors
- Rooting hormone (powder or gel)
- A small container or tray with drainage holes
- A sterile, well-draining propagation mix (I use peat moss mixed with perlite or vermiculite)
- Clear plastic bag or dome to maintain humidity
- Spray bottle for misting
- Labels (especially useful if I’m propagating multiple azalea varieties)
How I Propagate Azaleas from Cuttings
1. Choose a Healthy Stem
I start by selecting a healthy, non-flowering stem from my azalea bush. It should be around 4 to 6 inches long, semi-hardwood, and free of pests or diseases.
I make my cut just below a leaf node since this is where roots are most likely to form. I always use sterilized pruning shears to avoid introducing pathogens.
2. Prep the Cutting
Next, I remove the lower leaves from the cutting, leaving just a couple of leaves at the top. If the leaves are especially large, I sometimes snip them in half to reduce water loss through evaporation.
Then I dip the cut end into rooting hormone. While this step is optional, I’ve noticed a big difference in root success and speed when I use it.
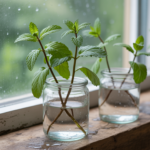
3. Plant in Propagation Mix
I prepare my container by filling it with the propagation mix. I moisten the mix lightly before inserting the cutting, so the soil is damp but not soggy.
Using a pencil or chopstick, I make a small hole in the mix, then gently insert the cutting an inch or two deep, firming the soil around it to hold it in place.
I usually plant a few cuttings in one container but give each enough space for airflow.
4. Create a Humid Environment
Azaleas root best in high humidity. To maintain moisture, I mist the cuttings with a spray bottle and cover the container with a clear plastic bag or humidity dome. If I’m using a plastic bag, I make sure it doesn’t touch the leaves by using skewers or wire to hold it up.
Then I place the container in a warm, bright spot out of direct sunlight. Bright indirect light is best—direct sun can scorch the tender cuttings.
Daily Care and Root Development
I check on my azalea cuttings daily, misting when needed and making sure the mix stays moist. I avoid watering directly unless the soil dries out too much.
After about 4 to 6 weeks, I begin testing for root growth by gently tugging on the cuttings. A little resistance means roots are developing. Some varieties may take longer, so I stay patient and keep monitoring.
Once I see signs of healthy root development, I let the cuttings grow a bit longer in their tray until the roots are strong enough to handle transplanting.
Transplanting and Growing On
When the roots are well-developed (usually in 8 to 10 weeks), I transplant the young azaleas into individual pots using regular potting mix.
I place these pots in a protected area outdoors—like a covered porch—where they can adjust to outdoor conditions gradually. I keep them watered consistently and shaded from intense sun as they establish.
If I propagated in early summer, I usually let the new azaleas grow in pots through fall and transplant them into the ground the following spring. If I rooted them in autumn, I keep them indoors or in a sheltered cold frame over winter.
Tips for Success
- Avoid flowering stems: Focus on stems without blooms. Flowering drains energy that should go into root development.
- Keep things sterile: Use clean tools and containers to reduce the risk of fungal issues.
- Humidity matters: Dry air will stress the cutting. Covering helps retain moisture.
- Don’t rush it: Some azaleas take longer than others to root. Be patient and let nature work.
Final Thoughts
Growing azaleas from cuttings is one of my favorite ways to expand my garden while preserving sentimental plants. Whether I’m propagating a beloved variety or gifting new shrubs to friends, the process never loses its magic. Watching new roots form and leaves unfurl on something I propagated myself is incredibly rewarding.
If you’ve been thinking about multiplying your azaleas or just want to try something new in the garden, I hope you give cuttings a try. It’s a simple, affordable, and deeply gratifying way to grow.
Happy planting, and may your garden be full of blooms!