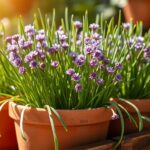
Stevia rebaudiana is a calorie-free powerhouse, perfect for gardeners seeking a natural sweetener. Growing this herb in pots is easy and enjoyable. Start with a 12-inch deep pot to give roots room to grow and ensure proper drainage.
Choose a quality potting mix blended with organic matter. This keeps the soil loose and well-drained.
Full sun is key for flavor, but in hot climates, place pots where they receive morning light and afternoon shade. Water when the top inch of soil dries out, but never let it sit in soggy conditions. Mulching around the base helps retain moisture during summer heat.
For optimal growth, maintain soil pH between 6.7 and 7.2 using a soil test kit. Regular feeding with water-soluble fertilizer keeps leaves healthy and sweet.
Harvest leaves in autumn before blooms appear—this is when their sugar content peaks. Store dried leaves in airtight containers for later use in teas or baking. In colder zones, move pots indoors before frost to protect this tender perennial. With the right pot, soil, and care, you’ll enjoy homegrown sweetness all year.
Introduction to Stevia: Nature’s Sweet Secret

Stevia is a tropical herb from Paraguay, used as a natural sweetener for over 1,500 years. It’s known as Stevia rebaudiana and its leaves are 30–40 times sweeter than sugar, with no calories. It’s perfect for growing herbs in pots because it fits well in small spaces. Let’s explore why it’s a great addition to your home garden.
What Makes Stevia Special
- Natural sweetness: Leaves are 30–40 times sweeter than sugar, perfect for low-calorie baking and drinks.
- Health legacy: Used for centuries in South America as a digestive aid and natural sweetener.
- Easy to cultivate: Grows well in containers with 6–8 hours of sunlight daily.
Benefits of Growing Stevia in Containers
| Benefit | Why It Works |
|---|---|
| Space-saving | A 10–12 inch pot holds a full plant, ideal for balconies or patios. |
| Climate control | Move indoors to protect from frost, extending harvests year-round. |
| Healthier growth | Containers let you tailor soil pH and nutrients for optimal sweetness. |
My Experience with Container-Grown Stevia
I started with a 12-inch terracotta pot and a mix of potting soil and perlite. Following stevia plant care basics, like weekly watering and moving it indoors in winter, I was amazed by my first harvest. The leaves were enough for homemade sugar substitutes, just like outdoor plants.
Even after two winters, the plant thrived with proper mulching and adjusting the light. Growing Stevia in containers is not just possible—it’s rewarding for any gardener.
Selecting the Right Container for Your Stevia Plant
Choosing the perfect container is key for your Potted Stevia plant. It’s all about finding the right balance of space, material, and drainage. These Tips for growing Stevia in containers will help your roots grow strong and your plant stay healthy.
Ideal Container Size and Material
Size is important. A 12-inch pot is best for grown plants, but start with a smaller one for seedlings. Here’s a guide for choosing the right size based on your plant’s growth:
| Stage | Pot Diameter (inches) |
|---|---|
| Seedling | 4–6 |
| Vegetative | 8–12 |
| Mature | 12–16 |
Drainage Considerations
Root rot is a big problem. Here’s how to keep your roots healthy:
- Use pots with 3–5 drainage holes
- Test pots by filling with water—watch it drain freely
- Avoid waterlogged soil by elevating pots slightly
Positioning for Optimal Growth
Put your containers in a spot with 6–8 hours of light each day. In hot places, some shade is good to prevent burning. Don’t put them in windy spots to protect the stems. Turn the pots weekly for balanced growth.
With the right container, your stevia will thrive. It’s ready for the next steps in its journey.
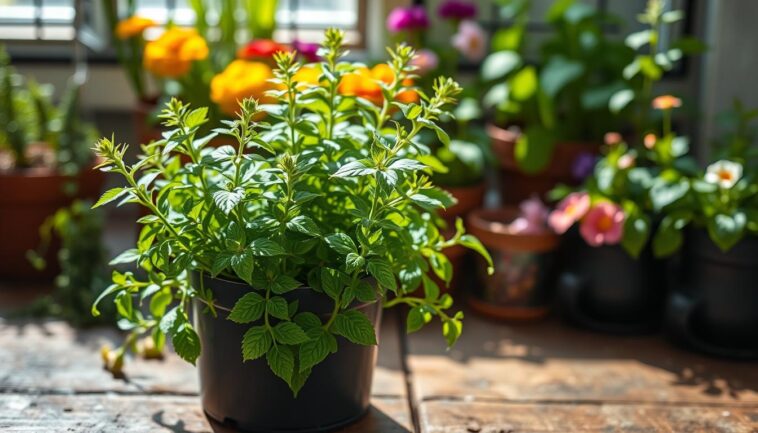
How to Grow and Care for Stevia in Pots: The Basics
Starting your How to Grow and Care for Stevia in Pots journey begins with timing. Wait until spring, after frost risks fade, to plant. Choose 12-inch pots with drainage holes—these containers balance space and drainage, key for healthy roots. I’ve found that spacing plants 18 inches apart, or using single plants per container, prevents overcrowding and boosts airflow.

- Light: Provide 6-8 hours of direct sunlight daily. South-facing spots work best.
- Water: Let the top inch of soil dry before watering. Avoid soggy soil—it invites root rot.
- Feed: Use a diluted, low-nitrogen fertilizer every 4-6 weeks to fuel leaf growth.
- Soil: Opt for well-drained, loamy mixes with a pH of 6.7-7.2. Commercial potting mixes or coconut coir work well.
- Mulch: Layer organic mulch around plants to retain moisture, specially in summer heat.
Regular checks matter. Watch for wilted leaves—a sign of underwatering—or yellowing leaves, which may signal overwatering. Harvest leaves before flowering in autumn for peak sweetness. Pinch stems regularly to encourage bushier growth. By sticking to these basics, you’ll build a strong foundation for thriving plants. These steps set the stage for the detailed care tips coming in later sections.
Soil Requirements for Container-Grown Stevia
Choosing the right potting mix is key for growing stevia in containers. It affects how sweet the leaves taste and how healthy the plant stays. I found that mixing ingredients to match stevia’s natural habitat helps it grow well. Here’s how to make the perfect mix.
Creating the Perfect Potting Mix
My mix starts with top-notch potting soil and perlite or coarse sand. This mix keeps the soil moist but also lets air in:
- 2 parts potting soil
- 1 part perlite or coarse sand
- 1 part aged compost
- Layer gravel at the bottom of containers to prevent soggy roots
Stevia loves sandy loam soil, so aim for that texture for the best results.
pH Levels and Amendments
Stevia does best in slightly acidic to neutral soil. Check the pH every year to keep it between 6.7 and 7.2. Use lime to raise it and sulfur to lower it:
- Lime to raise pH
- Sulfur to lower pH
- Monitor growth to spot pH imbalances early
I test the pH yearly to avoid nutrient lockout, which can slow growth.
Organic Options for Stevia Soil
Organic growers can enrich the soil with:
- Worm castings for slow-release nutrients
- Coconut coir as a peat alternative
- Composted manure for organic nitrogen
These additions keep the soil rich without synthetic chemicals, helping the plant stay naturally sweet.
Starting Your Stevia: Seeds vs. Cuttings

Choosing between seeds or cuttings is the first step in your journey. Tips for growing Stevia in containers often highlight cuttings as a faster option. But both methods work with the right care. Indoor Stevia plant care starts with understanding these options.
| Method | Seeds | Stem Cuttings |
|---|---|---|
| Germination Time | 14–21 days | 7–10 days |
| Effort | Requires warmth (70°F), patience | Easier success with rooting hormone |
| Sweetness | Variable | Consistent flavor |
| Indoor Use | Start indoors 6 weeks pre-frost | Perfect for quick indoor starts |
For seeds, sow them ½ inch deep and keep soil moist. I’ve found cuttings faster—they root in water or soil. Dip cut ends in rooting hormone, then plant in organic mix. Place in bright, warm spots.
- Seeds: Start indoors 6 weeks before last frost
- Cuttings: Use 4–6-inch stems from healthy plants
- Both need 70°F temps and indirect light during rooting
Buying nursery plants ensures strong starts, but DIY is rewarding. My advice: cuttings save time and guarantee sweet leaves. Adjust methods based on your patience level and indoor space.
Watering Techniques for Potted Stevia Plants
Learning to water your Potted Stevia plant right is essential. I learned to check the soil’s dryness and adjust with the seasons. Here are some effective ways to avoid common mistakes.

Establishing a Watering Schedule
Always check the soil moisture first. Stick your finger into the soil up to your knuckle—if it feels dry, it’s time to water. Water in the morning to lower disease risk. For Indoor Stevia plant care, use a watering can with a fine rose to avoid soil disruption. Mature plants need deep, less frequent watering to strengthen roots.
- Test soil moisture before each watering
- Water in morning to prevent fungal growth
- Adjust indoor watering based on room humidity
Signs of Overwatering and Underwatering
| Issue | Signs | Action |
|---|---|---|
| Overwatering | Yellow leaves, mold, mushy stems | Stop watering; let soil dry completely |
| Underwatering | Wilting, crispy edges, soil pulling away from pot | Water deeply and monitor daily |
Moisture Management in Different Seasons
In summer, water every 3-4 days. Check daily if temperatures soar. Winter slows growth—cut back to once every 10-14 days. Indoor plants may need misting in dry winter air.
- Summer: Water twice weekly, adjust for humidity
- Winter: Reduce to every 2 weeks, keep soil slightly drier
- Use pebble trays to boost humidity for indoor plants
Following these steps will keep your stevia healthy. Watch closely, and your plant will flourish season after season.
Light and Temperature Requirements for Healthy Stevia
Stevia plant care is all about sunlight and warmth. For Indoor Stevia plant care, try to match outdoor conditions. I’ve found that the right balance of light and warmth makes leaves sweeter and the plant healthier.
| Aspect | Guidelines |
|---|---|
| Light Exposure | Provide 8+ hours of daily sunlight. In hot climates, use shade cloth for afternoon sun. Indoors, place near a south-facing window or use LED grow lights for 12–14 hours daily. |
| Temperature Range | Optimal growth at 65–85°F. Protect plants below 45°F. Indoors, avoid drafty areas near windows or AC vents. |
| Seasonal Adjustments | In winter, move pots to sheltered areas. USDA zones 8–11: mulch roots to overwinter. In colder zones, transition plants indoors by early fall. |
For indoor setups, rotate pots weekly to ensure even light. Watch for dry leaves, which can mean the plant is too hot. If it gets colder than 50°F, water less to prevent root rot. Following these tips will help your stevia grow well anywhere.
Fertilizing Your Container-Grown Stevia

Container-grown stevia needs your help for nutrients because it can’t spread its roots. I use organic methods to make the leaves sweeter without losing flavor. Start with a balanced 10-10-10 NPK mix at planting time to help roots grow strong.
- Compost tea: Dilute and apply every two weeks to deliver gentle nutrients.
- Fish emulsion: Provides quick nitrogen boosts for leafy growth.
- Seaweed extract: Enhances drought tolerance and disease resistance.
Feeding Schedule
- Early growth: Use half-strength liquid fertilizer every two weeks.
- Mid-summer: Add slow-release granular fertilizer for sustained feeding.
- Flowering phase: Switch to a balanced fertilizer to enhance flavor.
Look out for yellow leaves (nitrogen deficiency) or purple edges (phosphorus shortage). These signs mean it’s time to change your feeding plan. Too much fertilizer can cause brown leaf tips; flush the soil with water to fix it. Use organic soil mixes and these tips to keep your stevia happy. These methods work for other herbs in pots too, but adjust the amounts for each plant’s needs.
Pruning and Maintaining Your Stevia Plant
Proper Stevia plant care means regular pruning. Start pinching stems when your stevia is 6–8 inches tall. This helps it grow bushy and produce more leaves for you to harvest.
- Pinch stem tips every 4–6 weeks to direct energy into leaf production.
- Remove flower buds as they form to prevent energy drain from leaves.
- Use clean, sharp scissors to avoid damaging brittle stems.
| Task | When to Do It | How to Do It |
|---|---|---|
| First pinch | When stems reach 6–8” | Remove top 1-2 leaves to force side branches |
| Flower removal | Early summer onward | Snip buds as soon as they appear |
| Seasonal trim | Spring renewal | Cut back leggy stems by 1/3 to stimulate new growth |
In fall, bring containers indoors if you’re in zones below 8–11. Trim back to 6” in spring before moving outdoors again. Tips for growing Stevia in containers also include checking roots annually—replace soil and repot every 12 months for best results. Avoid over-pruning in late summer to let the plant prepare for winter. Regular maintenance keeps your container-grown stevia productive and sweet-tasting all season long.
Troubleshooting Common Problems with Potted Stevia
Potted stevia plants can face problems even with good care. These tips help you solve issues early. We’ll tackle pests, diseases, and growth problems together.
Pest Management
Insects rarely bother stevia, but a few can appear. Here’s how to handle them:
- Aphids or whiteflies? Spray with neem oil or insecticidal soap. Repeat every 7 days.
- Spider mites thrive in dry conditions. Mist leaves weekly to raise humidity and deter them.
- Quarantine new plants for a week before adding to your garden. Check stems and leaves daily.
Disease Prevention and Treatment
Rot and mildew are the main threats. Prevent issues with these steps:
- Ensure containers have drainage holes. Let soil dry 2 inches deep between waterings.
- Spot powdery mildew as white powder on leaves. Treat with sulfur-based fungicides early.
- Trim crowded leaves to improve airflow. Avoid overhead watering to prevent leaf rot.
Resolving Growth Issues
Most growth problems stem from environment or care. Fix them with these steps:
- Wiltinged plants? Check soil moisture. Let soil dry completely if overwatered. Repot in fresh soil if roots rot.
- Yellow leaves signal low light or nutrient deficiency. Move to a sunnier spot and feed with diluted compost tea.
- Stunted growth? Prune leggy stems to encourage branching. Bring plants indoors before frost using grow lights in winter.
- Flowering is natural but signals energy diversion. Snip blooms to focus growth on leaves.
If plants show irreversible damage, take stem cuttings to propagate new ones. Most issues resolve with simple adjustments to light, water, or soil care.
Conclusion: Enjoying the Sweet Rewards of Your Stevia Plant
I’ve seen how How to Grow and Care for Stevia in Pots turns small areas into sweet spots. Harvest leaves when they’re ready and before they bloom. Autumn’s cool weather makes them even sweeter.
For drying, cut stems in the morning, remove leaves, and dry them in sunlight. Store them in airtight containers for months. You can even make a sweetener by crushing dried leaves into powder.
Fresh leaves are great for teas and desserts. You can also make extracts by soaking leaves in water or alcohol. Remember, stevia is 300 times sweeter than sugar, so use it sparingly.
Keep pruning your stevia to encourage new growth. This way, you’ll have more leaves to enjoy.
By growing herbs in pots, you’re not just raising a plant. You’re creating a sustainable kitchen treasure. Keep your stevia indoors during winter for year-round harvests. Every leaf is a reminder of the joy of growing something so versatile.
Whether you’re cutting down on sugar or exploring herbal gardening, stevia is a rewarding choice. Now, it’s time to enjoy the fruits of your labor!