
Growing chamomile in containers is easy and rewarding. It’s great for small spaces or those who want to control its spread. A 12-inch pot with holes for drainage is perfect for one plant.
Whether you’re new or experienced, growing chamomile in pots is fun. You can pick fresh flowers for tea or crafts from your porch or balcony.
Starting with the right setup is key for potted chamomile care. It prefers well-drained soil and bright light. But, it also does well in containers.
Choosing the right pot size is important. And, remember to sprinkle seeds on the soil without covering them. They need light to grow.
In this guide, I’ll share tips for growing healthy chamomile. We’ll cover selecting the perfect pot and protecting plants from summer heat. Let’s make your container garden bloom with this versatile herb!
Introduction to Chamomile: A Perfect Herb for Container Gardening

Chamomile does well in small spaces, making it great for balcony or patio gardens. It’s perfect for pots.
Choosing the Right Variety for Pots
There are two main types: Roman chamomile (Chamaemelum nobile) and German chamomile (Matricaria recutita). Roman chamomile is best for pots. It grows 3–6 inches tall and spreads like a fragrant groundcover.
German chamomile is taller and spreads too much for most pots. It’s better suited for open gardens.
- Roman chamomile: Perennial with daisy-like flowers; thrives in Miracle-Gro® potting mix.
- German chamomile: Annual with finer leaves; better in open gardens.
Why Grow Chamomile in Containers?
Container growing is flexible. It lets you:
- Control soil moisture and nutrients
- Moved easily to sunny spots or shelter from pests
- Avoid invasive spread common in open soil
Understanding the Growth Cycle
Roman chamomile blooms 12–16 weeks after planting. Seeds germinate in 1–2 weeks when soil temps hit 60–70°F. Flowering peaks in summer, with plants lasting 3–5 years in optimal pots.
German chamomile flowers faster (8–10 weeks) but only lives one season.
Pro tip: Space plants 8 inches apart in pots to prevent mildew. This spacing aids airflow, which is key for healthychamomile container gardening.
By choosing the right variety and following these basics, you’ll enjoy fresh blooms year after year. Next, we’ll dive into choosing the perfect pot for your plants!
Selecting the Right Pot for Your Chamomile Plant
Finding the right pot is essential for your chamomile plant. Choose a 12-inch pot with holes for drainage. This keeps roots healthy and prevents waterlogging. We’ll look at how to pick a pot that looks good and works well.
Ideal Pot Size and Material
A pot that’s at least 12 inches wide and deep is best. The material you choose affects how well it holds moisture and lasts:
| Material | Pros | Cons |
|---|---|---|
| Terracotta | Excellent drainage, breathable | Dries quickly, heavier |
| Ceramic | Stylish, long-lasting | Less porous, heavy |
| Plastic | Lightweight, affordable | Less natural look |
Drainage Requirements
Drainage holes are a must. Here’s what to do:
- Add 1-2 inches of gravel or broken pottery at the bottom
- Ensure pots have 3+ drainage holes to avoid root rot
- Repurpose pots without holes by drilling extra openings
Decorative Pots That Work
Find pots that are both stylish and practical. Here are some ideas:
- Window boxes or hanging baskets for vertical gardens
- Upcycled containers like buckets or baskets
- Group small pots together for a cluster effect
Even with decorative pots, drainage is key. Add mulch or stones on top for looks and to keep your pot in good shape.
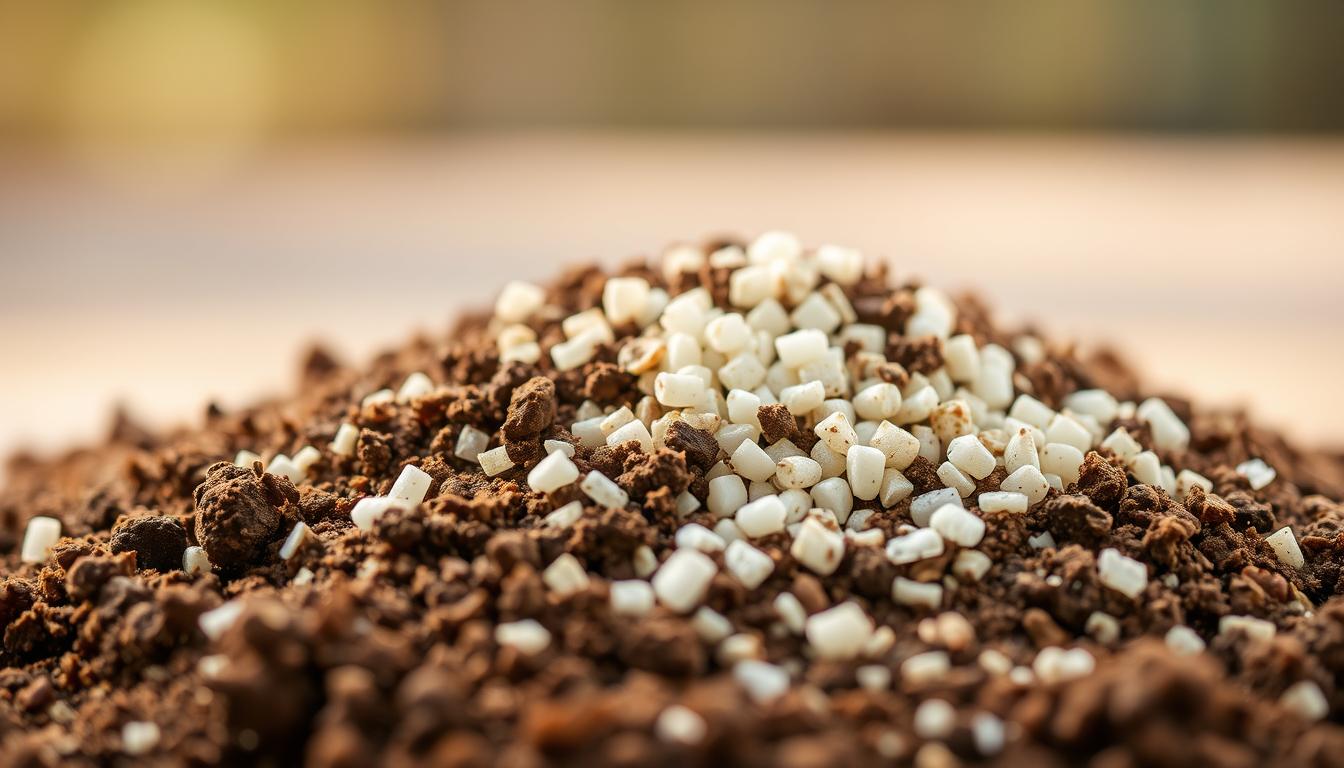
Creating the Perfect Chamomile Potting Soil Mix
Creating a great chamomile potting soil mix is all about balance. For growing chamomile in pots, focus on good drainage and nutrients. My favorite mix is 2 parts all-purpose potting mix, 1 part perlite, and 1 part coarse sand.
This mix helps prevent waterlogging and supports strong roots. It’s key for a healthy plant.
- 2 parts premium potting soil (loamy texture)
- 1 part perlite (improves airflow)
- 1 part coarse sand (enhances drainage)
Check the soil’s pH with a kit to keep it between 6.5 and 7.5. Use lime to make it less acidic or sulfur if it’s too alkaline. Don’t use garden soil as it can compact in pots.
Every year, refresh the soil with compost or worm castings. If leaves turn yellow or roots rot, it’s a sign of bad drainage or pH. Make small changes to the mix to avoid shocking the plants. By following these tips, you can grow chamomile in pots all year.
Starting Chamomile from Seeds vs. Transplants
Starting chamomile from seeds or transplants is a big decision. Both ways work well in pots but have different needs. Let’s look at the best choice for your garden.
Seed Starting Timeline and Techniques
Seeds give you flexibility when growing chamomile. Start them indoors 3-4 weeks before the last frost. Use Plantura Organic Herb & Seedling Compost.
Sprinkle seeds on moist soil, but don’t bury them. They need light to grow. Keep the soil at 45–55°F (7–13°C) for 7–14 days. A simple setup includes:
- Use small pots with drainage holes
- Water gently to avoid displacing seeds
- Thin seedlings to 15cm apart once they develop true leaves
Buying and Transplanting Chamomile Seedlings
Buying seedlings saves you weeks. Find healthy, leafy plants at nurseries. How to Grow and Care for Chamomile in Pots guides suggest this.
Transplant them outdoors after the last frost. Space plants 12–18 inches apart. To reduce shock:
- Water plants thoroughly before moving
- Use pots with drainage layers and sandy soil mix
- Gradually expose plants to outdoor conditions over 7–10 days
Winter Sowing Methods for Chamomile
Winter sowing is a natural way to start chamomile. Use milk jugs as mini-greenhouses:
| Step | Action |
|---|---|
| 1 | Poke holes in a milk jug lid for airflow |
| 2 | Fill ⅔ full with potting mix, add seeds on top |
| 3 | Secure the lid, place in a sunny spot outdoors |
| 4 | Seedlings emerge naturally in spring with this method |
This method works best in USDA zones 5–8. It protects seeds from spring frosts with mulch.
How to Grow and Care for Chamomile in Pots: Step-by-Step Guide
Learning chamomile care tips begins with planting. Here’s how to make your potted chamomile plant flourish from the start.
Planting Process and Spacing
First, pick the right containers for your chamomile type. German chamomile needs a 12-inch-wide pot, while Roman chamomile prefers 18–24 inches. Use a well-drained soil mix, leaving 2 inches at the top.
Plant seeds or seedlings 8–12 inches apart. Bury seeds ¼ inch deep. Add a thin layer of mulch to keep moisture in.
Sunlight Requirements
Put your How to Grow and Care for Chamomile in Pots in a sunny area. Full sun (6–8 hours daily) is best. But, afternoon shade helps in hot weather.
Rotate containers weekly. This ensures even light on patios or balconies.
Temperature Considerations
Keep an eye on the temperature! Move pots to shade if it gets too hot (90°F or 32°C). Bring them inside before the first frost.
Potted chamomile is easier to move. This helps it adapt to changes. Use insulated pots in cold areas to keep soil warm.
Watering Chamomile in Containers: Finding the Perfect Balance
Learning to water chamomile in containers right is key to their health. Consistency is the most important thing. Wait until the top ½ inch of soil feels dry before watering deeply. This helps prevent root rot and encourages growth.
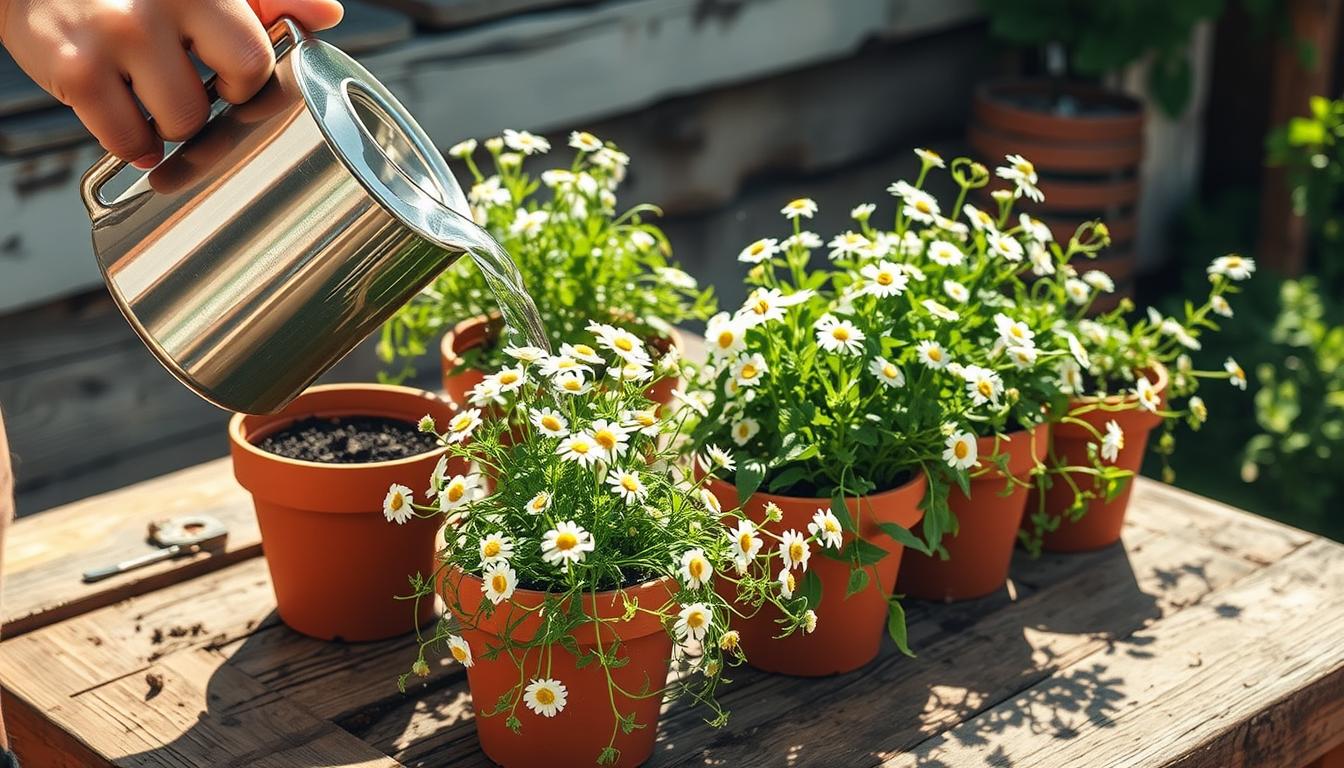
- Check soil moisture by poking your finger 1 inch deep. If dry, water thoroughly until it drains from the pot’s bottom.
- Provide 1–2 inches of water weekly, adjusting for rain or heatwaves. In summer, check moisture every 2–3 days.
- Use a watering can with a narrow spout to direct water to the soil, not leaves, reducing disease risk.
Too much water can turn leaves yellow and stems mushy. Not enough water makes leaves wilt and growth slow. Adjust your chamomile care tips for your area’s climate. In hot places, mulch to keep moisture in and protect roots from heat.
For chamomile pot maintenance, make sure pots drain well and don’t let water collect at the bottom.
Water in the morning so leaves dry by night, avoiding fungal problems. I check soil weekly and adjust as needed. A balanced approach keeps chamomile blooming all season!
Fertilizing Schedule for Potted Chamomile Plants
Knowing when and how to feed your potted chamomile plant is key. Too much fertilizer can reduce its scent. So, I use gentle, regular feedings to help it grow without losing its essential oils.
Organic Fertilizer Options
For organic feeding, I suggest compost tea or worm castings. They release nutrients slowly. Here’s what I find works best:
- Compost tea or liquid kelp for biweekly boosts
- Slow-release pellets mixed into topsoil twice yearly
- Fish emulsion diluted to half strength monthly
Spotting Nutrient Issues Early
Yellow leaves or slow growth mean trouble. Common problems include:
- Nitrogen: pale leaves, slow growth
- Potassium: brown leaf edges
- Phosphorus: purple undersides
Change your feeding schedule if these signs don’t improve.
My Month-By-Month Routine
My routine keeps my potted chamomile plants healthy:
- Early spring: Start with diluted fertilizer once monthly
- Summer peak: Add half-strength feed every six weeks
- Fall: Stop feeding two months before frost
Always water before feeding to prevent root burn. A 10-10-10 fertilizer diluted by 50% is best. Organic options make chamomile care simple and effective.
Common Pests and Diseases in Container-Grown Chamomile

Even the hardiest potted chamomile plant may face challenges. These chamomile care tips and proactive maintenance help keep your plants thriving naturally.
Prevention Strategies for Healthy Plants
Start with proper spacing to allow airflow. Overcrowding invites mildew. Sanitize pots yearly with a 10% bleach solution. Water at soil level to avoid leaf dampness. Mulch around plants and pair with marigolds—they deter aphids. These steps strengthen plant resilience.
- Keep plants 12–18″ apart for airflow
- Sanitize containers yearly
- Water at soil level
- Plant marigolds nearby
Natural Remedies for Pest Control
Aphids leave sticky residue on stems. Mix 1 tbsp dish soap with 1 quart water for small infestations. Neem oil treats scale insects. Copper tape repels slugs leaving silvery trails. Beneficial ladybugs eat aphids. Always test sprays on a small area first.
- Insecticidal soap for aphids and mealybugs
- Neem oil for persistent outbreaks
- Copper tape barriers for slugs
- Handpick snails at dawn
Treating Fungal Issues in Potted Chamomile
Powdery mildew appears as white spots. Remove affected leaves and boost airflow. Root rot from overwatering causes wilting and blackened roots. Repot in fresh, well-draining soil. Fungicides like sulfur sprays treat mildew. Never compost diseased parts.
I’ve found regular chamomile pot maintenance catches issues early. Adjust watering habits to prevent soggy soil.
Harvesting Chamomile from Pots: Timing and Techniques
Timing is key when picking chamomile from pots. The best time is early morning, when dew is gone but the sun isn’t too strong. Look for flowers with petals that curve back slightly and a yellow center that’s about two-thirds open. This means they have the most oil for teas or remedies.
- Cut stems just below the flower head with sharp shears or clean fingers. Avoid bruising delicate blooms.
- Never take more than a third of the plant at once. This keeps your potted chamomile plant healthy and encourages new growth.
- Harvest every two weeks once blooms appear. A single plant can yield 3-4 harvests per season with proper care.
I dry my chamomile by spreading blooms in a single layer on a screen in a warm, dark spot. For faster drying, use a dehydrator set to 110°F. Once crisp, store in airtight jars away from light. Frozen flowers keep for six months, but dried blooms retain aroma longest.
Tip: Skip washing flowers before drying—they mold faster when wet. Instead, gently shake off debris before processing.
Using Fresh and Dried Chamomile from Your Container Garden
After harvesting chamomile from pots, the fun begins. Every step of growing chamomile leads to this moment. You can use it in teas, remedies, and creative projects. Let’s explore how to preserve and enjoy every petal.
Drying and Storage Methods
Proper drying starts with timing. Pick flowers when fully open, usually mid-morning after dew dries. Here’s how to preserve them:
- Air-Drying: Spread flowers on a mesh screen or rack in a cool, dark room. Cover with cheesecloth to block dust. Stir daily—this takes 7–14 days.
- Dehydrator: Set to 110°F (43°C) for 12–24 hours for even drying.
- Oven Method: Place flowers on a baking sheet at 170°F (77°C) for 2–3 hours, checking frequently.
Store dried flowers in airtight jars (like mason jars) labeled with dates. Keep them in a cool, dark place. Properly stored, they’ll last up to a year.
Chamomile Tea and Other Culinary Uses
Beyond tea, chamomile adds floral flair to meals. Try these ideas:
- Infused Honey: Mix fresh or dried petals with honey for a soothing sweetener.
- Baked Goods: Sprinkle dried petals into muffins or scones for subtle flavor.
- Bath Salts: Combine dried chamomile with Epsom salts for relaxing baths.
- Syrups: Steep petals in simple syrup for cocktails or drizzling over pancakes.
Medicinal Applications for Home-Grown Chamomile
My favorite way to use chamomile is in DIY remedies. Here’s how to make them safely:
- Hydrosol: Save the water after steeping tea for a natural linen spray.
- Salves: Infuse oil with dried flowers, then mix with beeswax for a skin-soothing balm.
- Tinctures: Steep dried chamomile in alcohol for 4–6 weeks, then strain for long-term storage.
Every batch from my chamomile container gardening experiments reminds me why this herb is a kitchen and medicine cabinet staple. Experiment, label your creations, and enjoy the rewards of your homegrown harvest!
Conclusion: Enjoying the Rewards of Your Potted Chamomile Garden

Growing chamomile in containers is more than just caring for plants. It connects you to ancient herbal traditions. The Greeks and Romans used chamomile for healing, and now you can too. You can make tea for calm mornings or use it in skincare.
A chamomile container garden takes patience, but it’s worth it. Its flowers attract good bugs and its scent keeps pests away. By adjusting where your plant gets sunlight, it will grow well even in small spaces. You can enjoy fresh flowers for tea or dried petals for potpourri all year.
As your plants grow, think about adding basil or tomatoes to your garden. They help each other, making harvests more fun. When winter comes, keep your chamomile in a sunny spot. Every step, from planting to making tea, shows how easy it is to grow chamomile.
My chamomile pots have made a peaceful spot on my balcony. They bring beauty and health. Share your gardening stories and tips with others. With care, your chamomile will keep blooming, showing that even small pots can bring big rewards.
