If you’re looking for a fast-growing, low-maintenance vegetable to grow in containers, radishes are a fantastic choice. As someone who loves gardening but doesn’t always have the space for a full garden bed, I’ve found that radishes thrive in containers. They’re not only easy to grow, but they also provide an instant harvest, making them perfect for beginner gardeners or anyone with limited space. Here’s how I grow and care for radishes in containers.
Choose the Right Container
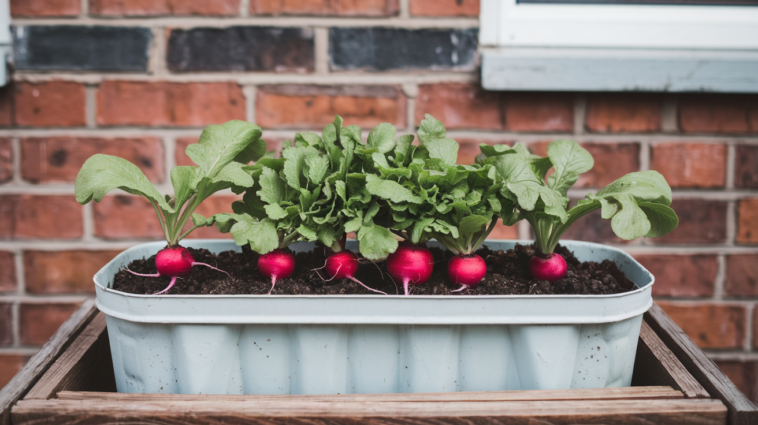
Radishes don’t need a huge amount of space, but they do require enough room for their roots to grow. I usually go for a container that is at least 6 to 8 inches deep, which is plenty for most radish varieties. You can use anything from a plastic pot, to a wooden crate, or even an old bucket, as long as it has drainage holes. Radishes don’t like their roots sitting in water, so good drainage is essential. The more shallow your container, the more frequently you’ll need to check moisture levels. I’ve also found that wider containers help give each radish enough room to grow comfortably.
If you’re planting multiple containers, be sure to space them out properly, as overcrowding can lead to competition for nutrients and light.
Select Your Radish Variety
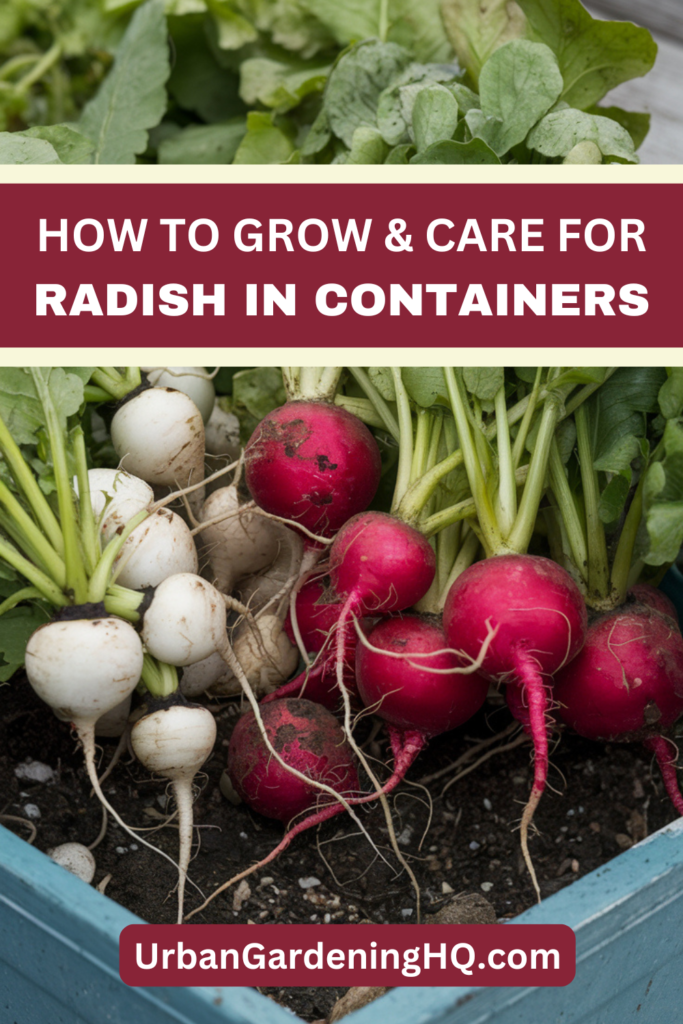
There are so many types of radishes, but the most common ones I grow in containers are Cherry Belle (small, round, and red) and Daikon (longer, white radishes). For beginners, I recommend going with something simple like Cherry Belle since they mature quickly, typically in 3 to 4 weeks. If you have more space and time, you can experiment with larger varieties, but keep in mind that some may need deeper containers.
Other varieties you might try include French Breakfast (an elongated, pink-and-white type) or Black Spanish (a more unusual, spicy, black-skinned radish). Just be sure to check the growth habits of the variety you choose to make sure it fits the size of your container.
Prepare the Soil
Radishes prefer light, well-drained soil, so I always use a good quality potting mix. I’ve had the best luck mixing in a little bit of compost for added nutrients. Radishes also like a slightly acidic to neutral pH, so aim for a pH of around 6.0 to 7.0. Fill your container with soil, leaving about an inch or two from the top to allow for watering.
To improve soil aeration and root development, I sometimes add a bit of perlite or vermiculite to the mix. This helps prevent the soil from compacting, which could stunt radish growth.
Planting Your Radishes
I like to plant radish seeds about ½ inch deep and space them about 1 to 2 inches apart. Overcrowding can result in small, stunted radishes, so don’t plant too many in one container. If you’re unsure about spacing, it’s better to start with fewer seeds and thin them later on. If you’re planting multiple rows, leave about 4-6 inches between them.
To maximize your harvest, consider practicing succession planting. This means planting a new set of radish seeds every 2 to 3 weeks. This technique ensures that you always have fresh radishes ready to harvest throughout the season, even if the first batch is finished.
Watering and Care
Radishes love moisture, but they don’t like sitting in waterlogged soil, so consistent, light watering is key. I make sure to water my containers regularly, especially during dry spells, but I always check the soil to ensure it’s not soggy. Watering in the morning is the best time to avoid any risk of fungal diseases. I also make sure the water doesn’t hit the leaves directly, as damp foliage can encourage mildew.
During warmer months, I keep an eye on the temperature. Radishes do best when the weather is cooler—ideally between 50 and 65°F (10-18°C). If you’re growing radishes in the summer, consider placing your container in partial shade to protect them from the heat. Excessive heat can cause radishes to mature too quickly, resulting in smaller or bolted (flowering) radishes.
As radishes grow, they don’t require a lot of additional care. They do well in cooler weather, so I like to plant them early in the spring or in the fall when temperatures are moderate. If the weather gets too hot, they may bolt (go to seed), which will result in tough, bitter roots. If this happens, I usually pull them up and try again with a new batch.
Thinning and Harvesting
Once my radish seedlings start sprouting, I thin them out to give the remaining ones room to grow. I typically space them around 2 inches apart. Thinning is essential because it prevents overcrowding, allowing each radish to develop a healthy root. If I don’t thin them, the roots end up too small or poorly shaped.
Radishes grow fast, and I usually start checking them after about 3 weeks. I gently pull one out to see if it’s ready, and if it is, I’ll harvest the whole crop. The key is not to leave them in the container too long, as they can become woody and tough. Depending on the variety, radishes are typically ready to harvest in 4 to 6 weeks.
If you’re harvesting more than you can eat at once, radishes store best in the fridge, especially if you remove the tops. The leaves tend to wilt quickly, so I cut them off, leaving a bit of the stem on the root. I also place them in a plastic bag or container to maintain their crispness.
Pests and Problems
While radishes are pretty hardy, they can be susceptible to a few pests, such as aphids or flea beetles. I try to inspect my plants regularly and use organic pest control methods like neem oil if I notice any signs of trouble. Another common issue is root rot, which is usually caused by overwatering. I make sure my containers drain well and I never let the soil become soggy.
Occasionally, I’ve seen tiny holes in my radishes. This is usually the work of root maggots, a common pest for radishes. To avoid them, I cover my containers with floating row covers, which also helps protect against flea beetles. Crop rotation is another great way to reduce pest problems. Avoid planting radishes in the same container year after year, as pests tend to build up in the soil.
Radishes and Companion Planting
Radishes make great companions for other plants, especially leafy greens like lettuce or spinach. I’ve found that they grow well alongside herbs like cilantro or parsley too. Radishes help break up the soil, improving aeration, which benefits neighboring plants. If you’re short on space, this is a great way to get multiple crops in one container.
Enjoying Your Radish Harvest
Once harvested, I love adding radishes to salads for a fresh, peppery bite. They can also be pickled or roasted for a different twist on this crunchy veggie. The greens are edible too, though a little tougher, and I sometimes toss them into soups or use them in pesto.
Radishes can also be used as a garnish for tacos, sandwiches, or grain bowls. Their bright color and crunchy texture make them a beautiful addition to any dish. Plus, with all the different varieties, you can have radishes of every color, shape, and flavor!
Conclusion
Growing radishes in containers is an easy and rewarding experience that even a beginner gardener can enjoy. With minimal effort, you can have fresh, crunchy radishes ready in a matter of weeks. Whether you have a tiny balcony or a larger patio, container gardening makes it possible to grow radishes anywhere. And with so many varieties to choose from, you’ll never get bored of growing and eating them!

