Swiss chard is one of my favorite leafy greens to grow in containers. Not only is it incredibly nutritious, but it also adds a pop of color to my garden with its vibrant stems in shades of red, yellow, pink, and white. Unlike other greens, Swiss chard is heat-tolerant, slow to bolt, and can be harvested over a long period, making it a staple in my container garden.
Over the years, I’ve perfected my method for growing Swiss chard in pots, ensuring a steady supply of fresh, tender leaves for salads, sautés, and soups. Here’s how I do it!
Choosing the Right Container
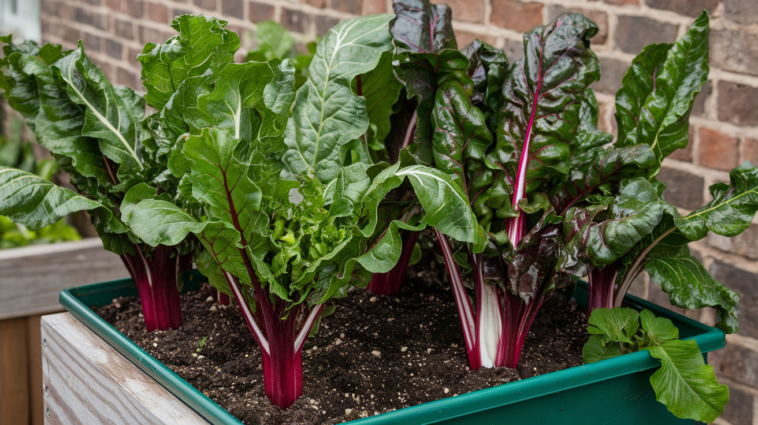
Swiss chard has a deep root system, so I make sure to choose a container that is at least 12 inches deep and 12–16 inches wide. If I’m growing multiple plants, I use a larger pot or a rectangular planter to give each plant enough space.
When it comes to material, I prefer plastic, fabric grow bags, or glazed ceramic pots since they retain moisture better than terracotta. Drainage is crucial, so I always ensure my containers have several drainage holes to prevent water from pooling at the bottom.
Selecting the Best Swiss Chard Varieties for Containers
Swiss chard comes in different varieties, and I love experimenting with a mix of colors and textures. Some of my favorite container-friendly varieties include:
- Bright Lights – A mix of colorful stems in red, pink, orange, and yellow.
- Fordhook Giant – Produces large, deep green leaves and is highly productive.
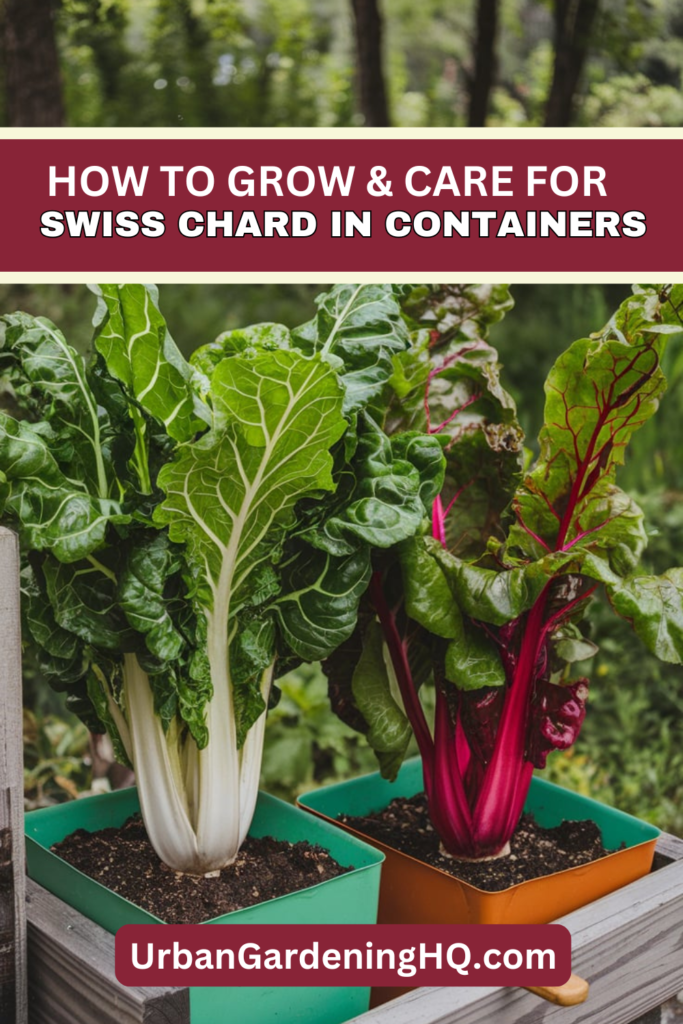
- Rhubarb Chard – Deep red stems with crinkled green leaves, adding a striking contrast to any garden.
- Peppermint Chard – Features pink and white striped stems, making it as beautiful as it is tasty.
For a more colorful container display, I often mix different varieties in the same pot, creating a stunning blend of vibrant stems and lush green leaves.
Planting Swiss Chard in Containers
Using the Right Soil
Swiss chard thrives in rich, well-draining soil. I use a high-quality potting mix blended with compost to provide essential nutrients. To improve drainage, I mix in a bit of perlite or sand, ensuring the roots don’t become waterlogged.
Planting from Seeds or Seedlings
I usually direct sow Swiss chard seeds in my containers because they germinate quickly and adapt better than transplants. However, when I do start with seedlings, I handle the roots carefully to avoid transplant shock.
- I plant seeds ½ inch deep and space them about 4–6 inches apart.
- Once the seedlings are a few inches tall, I thin them out, leaving the strongest plants about 6–8 inches apart to allow room for growth.
- If using seedlings, I transplant them at the same spacing and water them thoroughly.
Swiss chard is a cut-and-come-again crop, so I make sure to plant enough to enjoy a continuous harvest throughout the season.
Caring for Swiss Chard in Containers
Watering
Swiss chard prefers consistent moisture but doesn’t like soggy roots. I water deeply whenever the top inch of soil feels dry, usually every 2–3 days, depending on the weather. During hot summer months, I check my containers daily to prevent the soil from drying out too quickly.
Mulching around the base of the plants helps retain moisture and keeps the roots cool. I use straw, shredded leaves, or grass clippings as a natural mulch.
Fertilizing
Because container plants rely on me for nutrients, I fertilize my Swiss chard regularly.
- At planting, I mix in a slow-release organic fertilizer or compost to provide a steady source of nutrients.
- Every 3–4 weeks, I feed my plants with a liquid fertilizer such as fish emulsion or compost tea to keep the leaves lush and healthy.
I avoid high-nitrogen fertilizers, as they can cause excessive leaf growth without strengthening the plant’s overall structure.
Pest and Disease Management
Swiss chard is relatively resistant to pests, but I do keep an eye out for common garden nuisances like aphids, leaf miners, and snails.
- If I notice aphids, I spray them off with a blast of water or apply a diluted neem oil solution.
- Leaf miners can leave white trails on the leaves, so I remove affected leaves immediately to prevent the larvae from spreading.
- Slugs and snails love tender Swiss chard leaves, so I place crushed eggshells or diatomaceous earth around the base of my containers to deter them.
Proper spacing and good air circulation help prevent fungal diseases like powdery mildew, which can sometimes affect leafy greens in humid conditions.
Harvesting Swiss Chard
One of the best things about Swiss chard is that I can harvest it continuously for months.
- When the leaves reach 6–8 inches long, I start harvesting the outer leaves, allowing the center leaves to continue growing.
- I cut the leaves at the base with sharp scissors, being careful not to damage the growing point.
- If I want baby Swiss chard, I harvest the leaves when they are young and tender, usually around 4 inches tall.
Since Swiss chard is a cut-and-come-again plant, my containers stay full of fresh greens throughout the season. Even in mild winters, I’ve been able to extend my harvest by placing my pots in a sheltered area or covering them during frosty nights.
Why I Love Growing Swiss Chard in Containers
Growing Swiss chard in containers has been a game-changer for my small-space garden. It’s easy to grow, low-maintenance, and incredibly productive. Plus, the colorful stems add a decorative element to my patio or balcony.
By keeping my Swiss chard in pots, I can control the soil quality, move the containers for the best sunlight, and reduce pest problems compared to growing it in the ground. Whether you’re a beginner or an experienced gardener, Swiss chard is an excellent choice for container gardening.
If you haven’t tried growing Swiss chard in pots yet, I highly recommend it! Let me know what varieties you’re growing and how they’re doing—I’d love to hear about your experience. Happy gardening!